Jul . 28, 2024 05:19 Back to list
Steps to Effectively Remove a Trailer Brake Drum for Maintenance and Repair
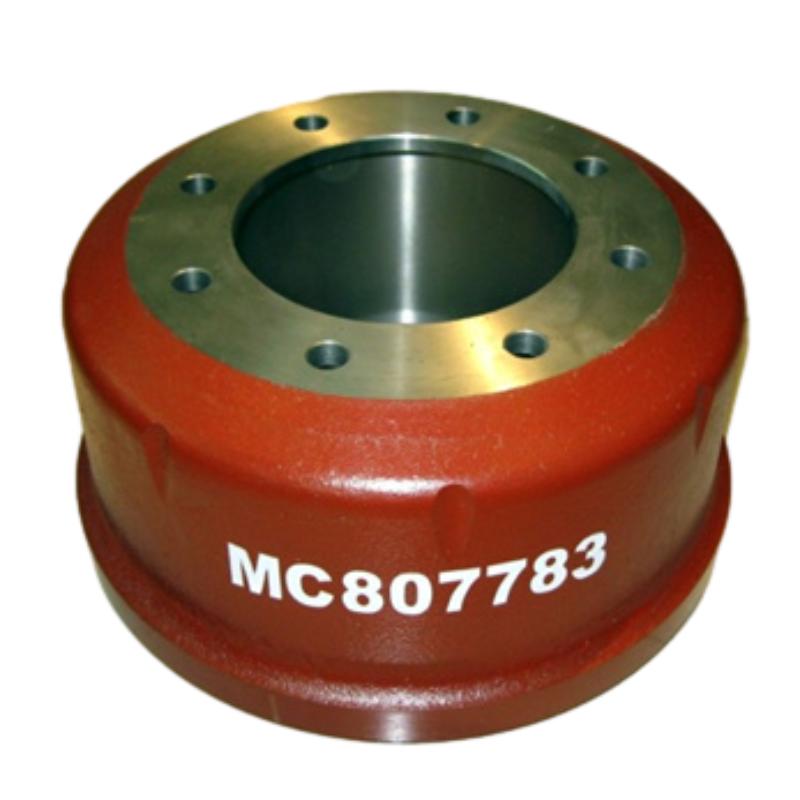
How to Remove a Trailer Brake Drum
Removing a trailer brake drum might seem daunting at first, but with the right tools and guidance, it can be a straightforward process. Whether you’re performing maintenance or replacing worn parts, it’s crucial to ensure your trailer’s braking system is functioning correctly for safety on the road. Here’s a step-by-step guide to help you effectively remove a trailer brake drum.
Tools and Materials Needed
Before starting, gather the necessary tools and materials. You will typically need
- Jack and jack stands - Lug wrench - Brake drum puller (if necessary) - Screwdrivers (flathead and Phillips) - Brake cleaner - Rags or paper towels - Safety goggles and gloves
Step-by-Step Process
1. Ensure Safety First Park your trailer on a flat, stable surface, engage the parking brake, and chock the wheels to prevent movement. Always wear safety goggles and gloves to protect yourself.
2. Lift the Trailer Use a jack to lift the trailer and place it securely on jack stands. This ensures you have ample clearance to work safely on the brake system.
3. Remove the Wheel Begin by removing the wheel covering the brake drum. Use a lug wrench to loosen the lug nuts. Once they are loose, fully remove them and take off the wheel. Be sure to place the lug nuts in a safe location where they won't get lost.
how to remove a trailer brake drum

4. Inspect the Brake Drum Once the wheel is off, visually inspect the brake drum for any signs of wear or damage. Look for scoring, cracks, or excessive rust, which may indicate a need for replacement.
5. Remove the Brake Drum Most brake drums simply slide off once the wheel is removed. However, if the drum is stuck due to rust or wear, you might need to use a brake drum puller. Place the puller over the drum, and tighten it evenly until the drum comes off. Avoid using excessive force to prevent damaging the drum or backing plate.
6. Detach Brake Components With the drum removed, you can now see the brake components. Take a moment to inspect the brake shoes, springs, and other parts for wear. If you plan to replace any components, document their arrangement or take photos to guide reassembly.
7. Clean the Area Use brake cleaner to spray down the backing plate and brake components, removing dust and debris. This cleaning will help you perform any maintenance or repairs more effectively.
8. Replace or Repair If you're replacing the drum, simply reverse the removal steps. Install the new drum, ensuring it’s seated correctly. Reattach any components you removed, replace the wheel, and tighten the lug nuts to the manufacturer’s specifications.
9. Test the Brakes Before hitting the road, it's crucial to test the brakes. Reconnect the electrical brake connections (if applicable) and perform a functionality test to ensure everything is working properly.
Final Thoughts
Removing a trailer brake drum doesn't have to be a complicated task. Understanding the process and having the right tools can make the job easier and safer. Regular maintenance will not only extend the life of your trailer’s braking system but also ensure that you and others on the road remain safe. If you ever feel uncertain about any step, don’t hesitate to contact a professional for assistance. Remember, the integrity of your braking system is paramount when it comes to towing safety.
-
High-Quality Brake Drum MAZ – Durable Drum Brake Drum & Brake Drum and Brake Shoe Solutions
NewsJul.05,2025
-
High-Quality Brake Drum Iveco - Durable Drum Brake Drum & Brake Shoe Solutions
NewsJul.05,2025
-
High-Quality Brake Drum MAZ – Durable Drum Brake Drum & Brake Drum and Brake Shoe Solutions
NewsJul.04,2025
-
Brake Drum Man - High-Quality Drum Brake Drums & Brake Shoes for Reliable Performance
NewsJun.24,2025
-
High-Quality Brake Drum Kamaz – Durable Drum Brake Drum & Brake Shoe Replacement
NewsJun.10,2025
-
High-Quality Brake Drum Liza for Drum Brake Systems - Superior Durability and Performance
NewsJun.10,2025
