Aug . 01, 2024 07:11 Back to list
Steps to Safely Remove and Replace a Brake Drum for Your Vehicle Maintenance Needs
Removing a Brake Drum A Step-by-Step Guide
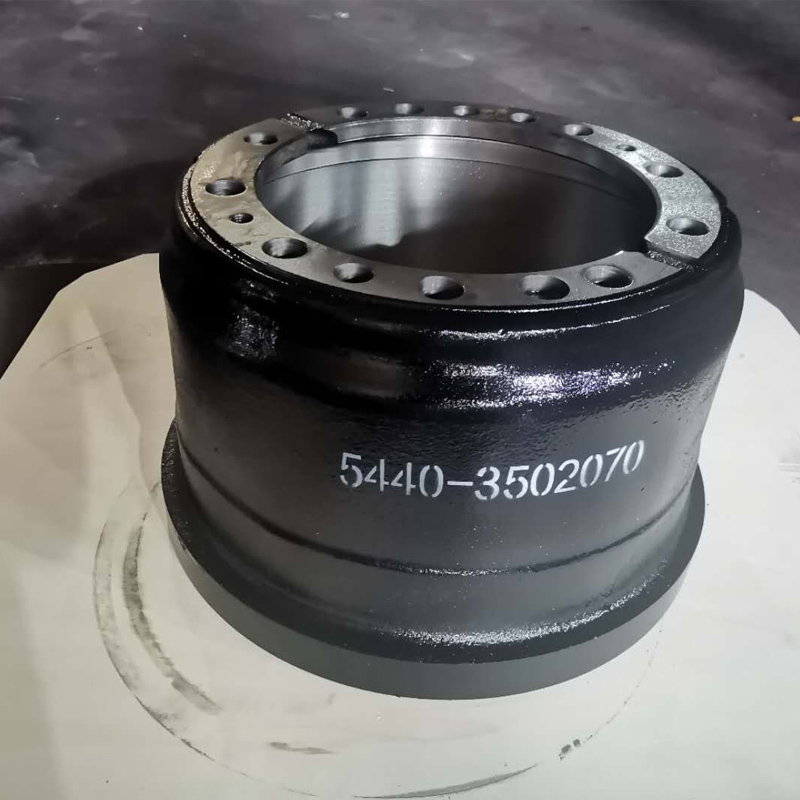
Removing a brake drum may seem like a daunting task, especially for those who are new to automotive maintenance. However, with the right tools, patience, and a comprehensive understanding of the process, you can efficiently complete this task. Brake drums are integral components of a vehicle’s braking system, and they house the brake shoes and the related hardware that help slow down the vehicle. This guide will walk you through the steps to remove a brake drum safely and effectively.
Tools and Materials Needed
Before you get started, it’s essential to gather the necessary tools and materials. You will need
- A lug wrench - A jack and jack stands - A brake drum puller (if necessary) - Screwdriver - Brake cleaner - A clean rag
Step 1 Preparation
Before attempting to remove the brake drum, ensure that the vehicle is parked on a flat, stable surface. Set the parking brake to prevent any movement. If the vehicle has an automatic transmission, ensure it’s in “Park,” while a manual transmission should be in gear.
Step 2 Loosening the Lug Nuts
Using a lug wrench, loosen the lug nuts on the wheel that you will be working on. It’s best to loosen them while the wheel is still on the ground, as this prevents the wheel from spinning. Turn the nuts counterclockwise to loosen them, but do not remove them completely yet.
Step 3 Lifting the Vehicle
Next, use a jack to lift the vehicle. Place jack stands under the vehicle to ensure it is stable and secure. This is a crucial step for safety, as working underneath a vehicle held up only by a jack can be hazardous.
Step 4 Removing the Wheel
Once the vehicle is securely lifted, completely remove the lug nuts and take off the wheel
. With the wheel removed, you can clearly see the brake drum, which is the component you intend to work on.removing a brake drum

Step 5 Inspecting the Brake Drum
Inspect the brake drum for any signs of wear, cracks, or overheating. If the drum is in good condition and simply needs to be removed for brake shoe replacement or adjustment, you may proceed. However, if it shows any significant damage, consider replacing it instead.
Step 6 Removing the Brake Drum
In many cases, the brake drum can be removed by simply pulling it straight off the wheel hub. However, if the drum is stuck due to corrosion or the brake shoes being pressed tightly against it, you may need to use a brake drum puller. Attach the puller according to the manufacturer’s instructions and turn the center screw to pull the drum away from the hub.
Note
If you encounter difficulty in removing the drum, check for retaining screws or clips that may be holding it in place.
Step 7 Cleaning and Maintenance
Once the drum has been successfully removed, take this opportunity to clean it with brake cleaner. Remove any dust or debris from the brake shoes and surrounding components to ensure optimal braking performance.
Step 8 Reinstallation
If you are merely inspecting or servicing the brake components, reinstall the brake drum by placing it back onto the wheel hub. Reattach the wheel, hand-tighten the lug nuts, and then lower the vehicle back to the ground before tightening the lug nuts in a crisscross pattern to ensure even torque.
Conclusion
Removing a brake drum is a straightforward process that can save you both time and money if done correctly. Always prioritize safety measures, and don’t hesitate to consult a professional if you encounter issues beyond your expertise. With practice and attention to detail, you’ll gain confidence in your automotive skills and ensure your vehicle remains in optimal working condition.
-
Brake Drum Man - High-Quality Drum Brake Drums & Brake Shoes for Reliable Performance
NewsJun.24,2025
-
High-Quality Brake Drum Kamaz – Durable Drum Brake Drum & Brake Shoe Replacement
NewsJun.10,2025
-
High-Quality Brake Drum Liza for Drum Brake Systems - Superior Durability and Performance
NewsJun.10,2025
-
High-Quality Brake Drum Kamaz – Durable Drum Brake Drum & Brake Shoe Solutions
NewsJun.10,2025
-
Durable Kamaz Brake Drums High-Performance Truck Parts
NewsJun.09,2025
-
Premium Brake Drum Maz Kit with Shoes Enhanced Braking
NewsJun.09,2025
