júl . 30, 2024 01:38 Back to list
Steps for Safely Removing Rear Brake Drum on Your Vehicle for Maintenance and Inspection
How to Remove Rear Brake Drums A Step-by-Step Guide
Removing rear brake drums is an essential part of automotive maintenance that many DIY enthusiasts and car owners can undertake with the right tools and knowledge. This procedure is generally applicable to a wide variety of vehicles, especially those with drum brake systems on the rear wheels. Properly maintaining your brake system is crucial for safety, so understanding how to remove and inspect your brake drums can help ensure your vehicle remains in top condition.
Safety First
Before you begin, safety should be your priority. Ensure you have the following tools and safety gear jack stands, a lug wrench, a brake drum puller (if necessary), a socket set, and safety goggles. Always work on a flat, stable surface, and engage the parking brake to prevent the vehicle from rolling.
Step 1 Prepare the Vehicle
Start by loosening the lug nuts on the rear wheels while the vehicle is still on the ground. Turn them counterclockwise to loosen, but do not remove them completely yet. Once loosened, use a jack to lift the rear of the vehicle. Secure it with jack stands to ensure stability while you work.
Step 2 Remove the Wheels
Once the vehicle is safely elevated, remove the lug nuts completely and take off the rear wheels. Place the wheels in a safe location where they won't be damaged or lost. With the wheels removed, you will have clear access to the brake drums.
Step 3 Inspect the Brake Drums
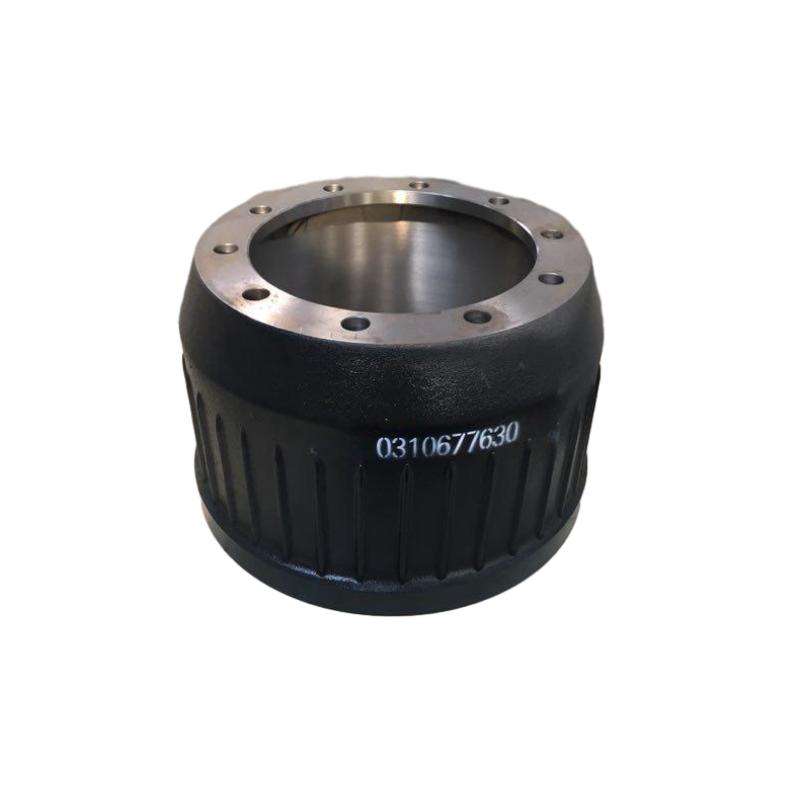
Inspect the brake drums for any visible signs of wear or damage. Look for cracks, scoring, or excessive wear on the surface. If you notice any significant issues, consider replacing the drums rather than just removing them for inspection.
rear brake drum removal

Step 4 Remove the Brake Drum
Brake drums are typically held in place by the wheel assembly, but in some cases, they may have retaining screws or clips. If your drums are stubborn and don’t come off easily, you may need a brake drum puller. Attach the puller to the drum, and turn the central screw to apply pressure to the drum. This gradual pressure should help loosen any rust or corrosion holding the drum in place.
If the drum has a bit of play but won’t budge, check for the adjuster mechanism, which may need to be backed off to allow the shoes to retract. The adjuster is usually located at the bottom of the brake assembly and can be accessed through a small hole in the backing plate.
Step 5 Clean and Inspect Components
Once the drums are off, inspect the brake shoes, springs, and hardware for wear and damage. Brake shoes should be replaced if they are worn down to the manufacturer's specifications. Clean the drum's interior surface, removing any dust or debris. This is also a great time to clean the wheel cylinder and ensure it operates smoothly.
Step 6 Reassemble
After inspecting and cleaning, you can reassemble the brake system. Make sure to replace or reinstall any components that were removed, including the brake drum. If you used a puller, ensure that all tools are removed and the area is clear.
Reattach the wheels, ensuring to tighten the lug nuts in a crisscross pattern to ensure even pressure. Lower the vehicle from the jack stands and finish tightening the lug nuts.
Conclusion
Removing rear brake drums can seem daunting, but with the right tools and a step-by-step approach, it is a manageable task. Always consult your vehicle’s service manual for specific guidelines and torque specifications. Regular maintenance of your brake system not only ensures safety but also extends the life of your vehicle’s braking components. If you feel uncomfortable at any stage, don’t hesitate to seek professional assistance.
-
High-Quality Brake Drum MAZ – Durable Drum Brake Drum & Brake Drum and Brake Shoe Solutions
NewsJul.05,2025
-
High-Quality Brake Drum Iveco - Durable Drum Brake Drum & Brake Shoe Solutions
NewsJul.05,2025
-
High-Quality Brake Drum MAZ – Durable Drum Brake Drum & Brake Drum and Brake Shoe Solutions
NewsJul.04,2025
-
Brake Drum Man - High-Quality Drum Brake Drums & Brake Shoes for Reliable Performance
NewsJun.24,2025
-
High-Quality Brake Drum Kamaz – Durable Drum Brake Drum & Brake Shoe Replacement
NewsJun.10,2025
-
High-Quality Brake Drum Liza for Drum Brake Systems - Superior Durability and Performance
NewsJun.10,2025
