
Feb . 12, 2025 13:53 Back to list
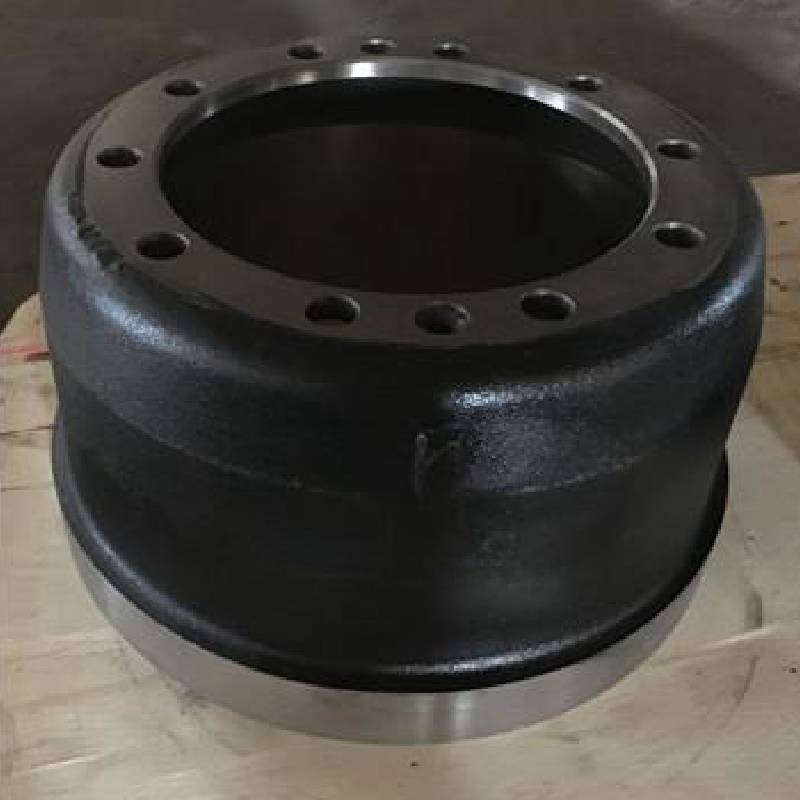
Mitsubishi Lancer Rear Drum Brakes
Removing stubborn brake drums can often be a challenging task, especially if you've never tackled it before. With years of experience in auto mechanics and a specialty in braking systems, I’m here to share the expert advice you need to succeed in this endeavor. Trust in a methodical and patient approach and you'll soon have those brake drums off in no time.
For especially stubborn cases, an alternative approach is using heat. A propane torch can be used to heat the drum carefully, thereby expanding the metal and loosening the bond formed by rust or corrosion. Exercise extreme caution when using this method to avoid damaging the brake components or harming yourself. If manual methods fail, a brake drum puller may be necessary. This tool clamps onto the drum and uses a screw mechanism to apply even pressure as it pulls the drum off. This technique is highly effective for drums that refuse to budge, but care must always be exercised to avoid damaging the internal brake components. Once the brake drum has been successfully removed, inspect it alongside the brake shoes and other components for wear and tear. If the drum or shoes appear worn beyond the manufacturer’s recommendations, replacement is the best course of action to ensure ongoing vehicle safety. Proper maintenance post-removal is the cornerstone of preventing future obstacles. Apply a thin layer of anti-seize lubricant to the hub before reinstalling the drum. This simple step can save significant hassle next time you need to remove the drum. In conclusion, removing a stubborn brake drum requires patience, the right tools, and a safe working environment. By following this step-by-step guide rooted in expertise and experience, you can approach this task with confidence. Remember, when in doubt, consulting a professional mechanic is the best option to ensure both your safety and that of your vehicle.
For especially stubborn cases, an alternative approach is using heat. A propane torch can be used to heat the drum carefully, thereby expanding the metal and loosening the bond formed by rust or corrosion. Exercise extreme caution when using this method to avoid damaging the brake components or harming yourself. If manual methods fail, a brake drum puller may be necessary. This tool clamps onto the drum and uses a screw mechanism to apply even pressure as it pulls the drum off. This technique is highly effective for drums that refuse to budge, but care must always be exercised to avoid damaging the internal brake components. Once the brake drum has been successfully removed, inspect it alongside the brake shoes and other components for wear and tear. If the drum or shoes appear worn beyond the manufacturer’s recommendations, replacement is the best course of action to ensure ongoing vehicle safety. Proper maintenance post-removal is the cornerstone of preventing future obstacles. Apply a thin layer of anti-seize lubricant to the hub before reinstalling the drum. This simple step can save significant hassle next time you need to remove the drum. In conclusion, removing a stubborn brake drum requires patience, the right tools, and a safe working environment. By following this step-by-step guide rooted in expertise and experience, you can approach this task with confidence. Remember, when in doubt, consulting a professional mechanic is the best option to ensure both your safety and that of your vehicle.
Latest news
-
High-Quality Trailers for Towing Needs | Shop Now
NewsJul.25,2025
-
Premium MAN Shaving Kit for Effortless Comfort
NewsJul.25,2025
-
HINO Advanced Machinery Solutions - LONGYAO COUNTY YIHANG MACHINERY | Industrial Efficiency&Customization
NewsJul.21,2025
-
HINO Machinery Solutions - LONGYAO COUNTY YIHANG MACHINERY MANUFACTURING CO.LTD | Precision Engineering, Customizable Configurations
NewsJul.21,2025
-
HINO Machinery Solutions - LONGYAO COUNTY YIHANG MACHINERY MANUFACTURING CO.LTD | Precision Engineering, Customizable Configurations
NewsJul.21,2025
-
HINO Machinery Solutions - LONGYAO COUNTY YIHANG MACHINERY MANUFACTURING CO.LTD | Precision Engineering, Customizable Configurations
NewsJul.21,2025