
Јул . 28, 2024 21:37 Back to list
Step-by-step guide for installing brake drums on your vehicle efficiently and safely
How to Install Brake Drums A Comprehensive Guide
Brake drums are essential components of a vehicle's braking system, particularly in older models and certain types of trucks. Installing brake drums can seem daunting at first, but with the right tools, materials, and a step-by-step approach, you can do it yourself and save on labor costs. This guide will walk you through the process of installing brake drums safely and effectively.
Tools and Materials Needed
Before beginning the installation, gather the following tools and materials
- Socket set - Wrench set - Brake drum puller (if necessary) - Screwdrivers (flathead and Phillips) - Brake cleaner - New brake drums (specific to your vehicle make and model) - New brake shoes (if replacing) - Torque wrench - Jack and jack stands
Step 1 Preparation
1. Park the Vehicle Ensure your vehicle is parked on a flat surface. Engage the parking brake to prevent any movement during the process. 2. Loosen the Lug Nuts Use a lug wrench to slightly loosen the lug nuts on the wheel that you will be working on, but do not remove them completely yet.
3. Lift the Vehicle Use a jack to lift the vehicle off the ground, then secure it with jack stands. This added safety measure will ensure that the vehicle remains stable while you work.
4. Remove the Wheel Now, completely remove the lug nuts and take off the wheel to access the brake drum.
Step 2 Remove the Old Brake Drum
1. Inspect the Drum Before removing it, inspect the brake drum for any signs of damage or wear. If it’s damaged, replacing it is necessary.
2. Remove the Brake Drum If the drum does not come off easily, you may need to use a brake drum puller to detach it from the wheel hub. If it’s stuck, gently tap around the drum with a hammer to loosen it.
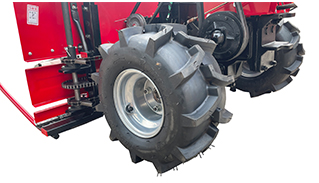
how to install brake drums
3. Check Brake Components Once the drum is off, take a moment to inspect the brake shoes, springs, and hardware. Replace any worn or damaged parts as needed.
Step 3 Install New Brake Drums
1. Clean the Hub Before installing the new brake drum, clean the hub surface with brake cleaner to remove any dust or debris.
2. Install New Brake Shoes If you’re replacing the brake shoes, follow the manufacturer’s instructions to install them. Ensure all springs and hardware are connected securely.
3. Put on the New Brake Drum Place the new brake drum over the brake shoes. Ensure it fits snugly without forcing it. Spin the drum to check for any restrictions.
4. Reattach the Wheel Place the wheel back onto the hub and hand-tighten the lug nuts. Ensure they are secured, but do not fully tighten them yet.
Step 4 Final Steps
1. Lower the Vehicle Carefully remove the jack stands and lower the vehicle back to the ground. Once it is stable, tighten the lug nuts in a crisscross pattern to ensure they are evenly secured. Use a torque wrench to tighten them to the manufacturer’s specifications.
2. Test the Brakes Before taking the vehicle on a road test, pump the brake pedal a few times to settle the brake shoes. This step is crucial for proper brake function.
3. Conduct a Test Drive Finally, take the vehicle for a brief test drive to ensure that the installation was successful and the brakes are functioning correctly.
Conclusion
Installing brake drums can be a rewarding DIY project that enhances your vehicle's safety. By following these steps and taking the necessary precautions, you can successfully complete the installation. However, if you encounter any difficulties or uncertainties, consult a professional to ensure your vehicle remains safe and reliable on the road. Safety first!
-
IVEKO High-Performance Brake Drums Durable & Precision-Engineered
NewsMay.17,2025
-
Brake Drum Man High-Quality Drum Brake & Shoe Solutions
NewsMay.17,2025
-
Brake Drum Man Premium Drum Brake & Shoe Solutions OEM-Compliant
NewsMay.16,2025
-
Brake Drum Man High-Quality Drum Brake & Shoe Kits for Vehicles
NewsMay.16,2025
-
Brake Drum Man High-Quality Drum Brake Parts & Expert Solutions
NewsMay.16,2025
-
Brake Drum Man High-Quality Drum Brake & Shoe Solutions
NewsMay.15,2025