नोभ . 20, 2024 05:13 Back to list
removing brake drums
The Process of Removing Brake Drums A Step-by-Step Guide
When it comes to vehicle maintenance, one of the crucial aspects that ensure safety and peak performance is the braking system. Brake drums, an essential component of many vehicles, play a pivotal role in slowing down or stopping a vehicle by using friction against brake shoes. Over time, these drums can wear out, become damaged, or corrode, necessitating their removal and possibly replacement. This article provides a step-by-step guide on how to effectively and safely remove brake drums.
Understanding Brake Drums
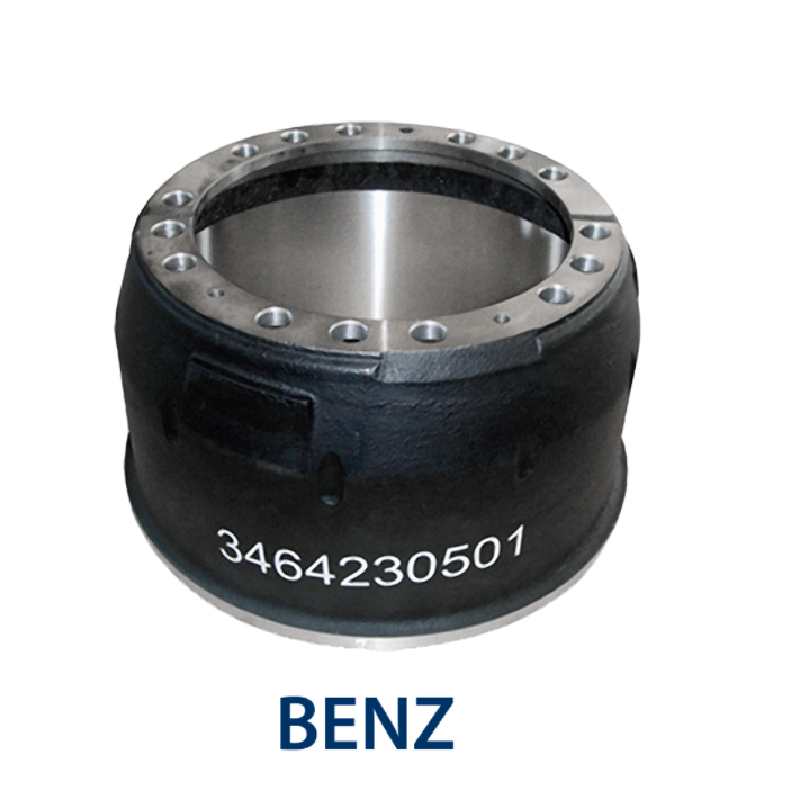
Before diving into the removal process, let’s briefly understand what brake drums are. Typically found in vehicles with rear drum brakes, these cylindrical metal components house the brake shoes. When the driver presses the brake pedal, hydraulic pressure pushes the brake shoes against the inner surface of the drum, thereby creating the friction needed to decelerate the vehicle.
Tools and Safety Gear Needed
Before starting, gather the necessary tools and safety gear - A jack and jack stands - A lug wrench - A brake drum puller (if required) - A socket set - Safety glasses and gloves - A torque wrench - Brake cleaner and a wire brush for cleaning
Step 1 Prepare the Vehicle
Safety is paramount when working on any automotive task. Begin by parking the vehicle on a flat, stable surface and engaging the parking brake. For additional safety, place wheel chocks behind the front wheels if you’re working on the rear brakes.
Step 2 Loosen the Lug Nuts
Using a lug wrench, loosen the lug nuts on the rear wheel where the brake drum is located. It’s best to do this while the wheel is still on the ground to prevent it from spinning. Turn each lug nut counterclockwise until they are loose, but do not remove them completely yet.
Step 3 Jack Up the Vehicle
Once the lug nuts are loosened, use a jack to lift the vehicle. Make sure to position the jack under the vehicle’s manufacturer-recommended lifting points. After lifting the vehicle, securely place jack stands underneath to provide additional support.
removing brake drums

Step 4 Remove the Rear Wheel
With the vehicle safely elevated, finish unscrewing and removing the lug nuts
. Take off the rear wheel, which will provide clear access to the brake drum.Step 5 Inspect the Brake Drum
Before proceeding to remove the drum, inspect it for any visible signs of damage, such as scoring or deep grooves. If you see significant wear, consider replacing the brake shoes and drum rather than simply removing it.
Step 6 Remove the Brake Drum
In many cases, the brake drum can be pulled straight off; however, if it is stuck due to rust, debris, or a lip formed at the edge, you might need a brake drum puller. If you have a puller, attach it according to the manufacturer’s instructions. Slowly tighten the puller until the drum loosens from the hub. If you’re not using a puller, gently tap the drum with a rubber mallet to encourage it to come off.
Step 7 Clean the Braking Components
Once the drum is removed, take the opportunity to clean the brake shoes and the surrounding area. Use a wire brush to remove rust or debris, and spray brake cleaner to ensure all dust and grime is eliminated.
Step 8 Inspect and Replace if Necessary
With the drum off, inspect the brake shoes for even wear and any signs of damage. If necessary, replace the shoes and install a new brake drum if the old one shows significant wear or damage.
Conclusion
Removing brake drums is a manageable task that can enhance the performance and safety of your vehicle. However, it’s essential to approach the job with the right tools and knowledge. If at any point you feel unsure, do not hesitate to consult a professional mechanic to ensure the job is done safely and effectively. Regular maintenance of the braking system not only prolongs the life of the components but also ensures your vehicle operates safely on the road.
-
Premium Brake Drum Iveco – Durable Drum Brake Drum & Brake Shoe Solutions
NewsJul.08,2025
-
High-Performance Brake Drum Liza for Enhanced Safety Reliable Drum Brake Drum & Brake Shoe Solutions
NewsJul.08,2025
-
High-Quality Brake Drum MAZ – Durable Drum Brake Drum & Brake Drum and Brake Shoe for Optimal Performance
NewsJul.07,2025
-
High-Quality Brake Drum Kamaz for Reliable Performance Durable Drum Brake Drum & Brake Shoes
NewsJul.07,2025
-
High-Quality Brake Drum Kamaz for Reliable Performance Durable Drum Brake Drum & Brake Shoe Replacement
NewsJul.07,2025
-
Brake Drum Man - High-Quality Drum Brake Drum & Brake Drum and Brake Shoe Solutions
NewsJul.06,2025
