Dec . 09, 2024 22:03 Back to list
Step-by-Step Guide to Installing Brake Drums on Your Vehicle
Brake Drum Installation A Step-by-Step Guide
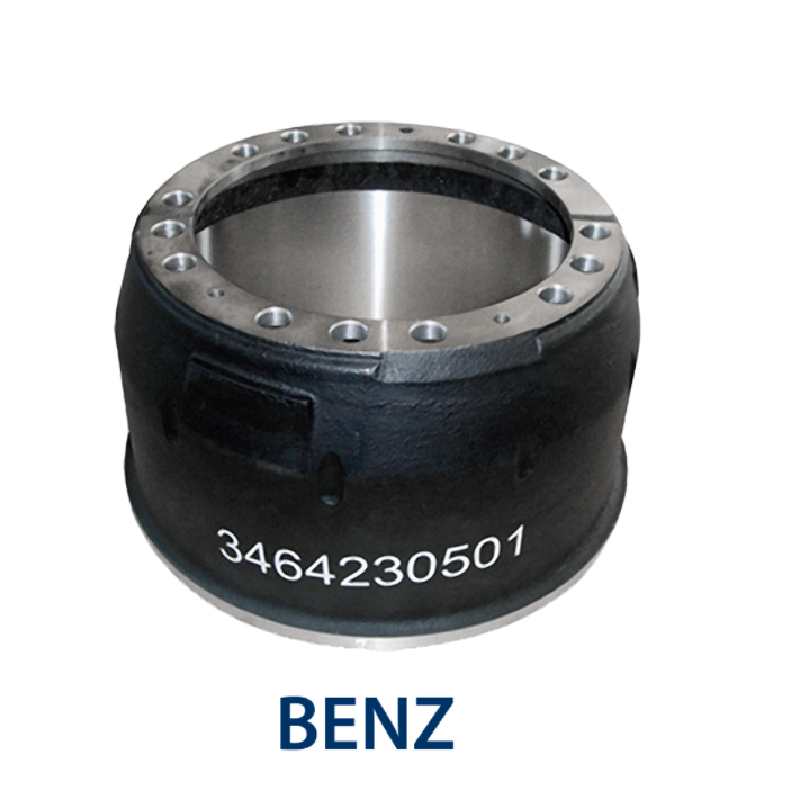
Brake drum installation is a critical aspect of vehicle maintenance that ensures optimal braking performance. Over time, brake drums can wear down due to friction, heat, and contamination, leading to decreased braking efficiency. Whether you're a seasoned mechanic or a DIY enthusiast, understanding how to properly install brake drums can help maintain your vehicle's safety and functionality. This guide will walk you through the necessary steps for a successful brake drum installation.
Tools and Materials Needed
Before starting the installation, gather the following tools and materials
- New brake drums - Brake shoes - Brake hardware kit (springs, clips, etc.) - Wrench set - Torque wrench - Screwdriver - Jack and jack stands - Brake cleaner - Lubricant
Step 1 Safety First
Always prioritize safety when working on your vehicle. Begin by parking the car on a flat surface and setting the parking brake. Use wheel chocks to prevent the vehicle from rolling. Before raising the car, it’s crucial to loosen the lug nuts slightly on the wheels where you will be installing the brake drums.
Step 2 Elevate the Vehicle
Using a jack, lift the vehicle from its designated lift points. Once the vehicle is elevated, secure it with jack stands to prevent it from falling. Then, remove the wheels by completely unscrewing the lug nuts.
Step 3 Remove the Old Brake Drums
With the wheels removed, locate the brake drum. If the drum is stuck due to rust or dirt, gently tap the drum with a rubber mallet to loosen it. Once it is free, carefully pull it off the wheel hub. Inspect the brake shoes for wear and replace them if necessary.
Step 4 Install New Brake Shoes (Optional)
brake drum installation

If you're replacing the brake shoes as well, install the new brake shoes according to the manufacturer's instructions. Ensure that all springs, clips, and hardware from the hardware kit are applied correctly. This ensures an even and reliable contact with the new brake drum.
Step 5 Clean and Prepare the New Brake Drums
Before installing the new brake drums, clean them with brake cleaner to remove any manufacturing oils or contaminants. Use a lint-free cloth for drying. Apply a thin layer of lubricant to the mating surfaces where the drum meets the wheel hub. This can help prevent sticking in the future.
Step 6 Install the New Brake Drums
Position the new brake drum over the brake shoes on the wheel hub. Make sure it is aligned correctly and then firmly slide it onto the hub. Rotate the drum slightly to ensure it fits over the shoes smoothly. Repeat this process for each wheel.
Step 7 Replace Wheels and Lower the Vehicle
Once all the new brake drums are installed, reattach the wheels. Hand-tighten the lug nuts to secure them in place. After replacing all wheels, lower the vehicle gently back to the ground, and use a torque wrench to tighten the lug nuts to the vehicle manufacturer's recommended torque specifications.
Step 8 Test the Brakes
Before driving the vehicle, it’s essential to pump the brake pedal a few times to seat the brake shoes against the new drums. Check for unusual noises or irregular behavior when you take the vehicle for a test drive. If everything feels right, your installation is complete.
Conclusion
Successfully installing brake drums is an essential skill for any vehicle owner or mechanic. By following these steps, you can ensure a safe and effective brake system. Regular maintenance and timely replacement of worn components will contribute to your vehicle's overall safety and performance on the road. Always remember to consult your vehicle's manual for specific instructions and specifications. Happy driving!
-
ROR Web Development: Build Fast, Scalable, Secure Apps
NewsAug.17,2025
-
Scania Brake Drums: OEM Quality for Optimal Safety & Durability
NewsAug.16,2025
-
R.V.I: Advanced Remote Visual Inspection for Precision
NewsAug.15,2025
-
Discover HYUNDA: Innovative Vehicles, Equipment & Solutions
NewsAug.14,2025
-
R.V.I: Unlock Advanced Insights & Real-time Performance
NewsAug.13,2025
-
Kamaz Brake Drum: Durable & Reliable for Heavy Duty Trucks
NewsAug.12,2025
