Dec . 04, 2024 09:30 Back to list
changing brake drums
Changing Brake Drums A Comprehensive Guide
When it comes to vehicle maintenance, one critical area that often requires attention is the braking system. Among the various components that contribute to effective braking, brake drums play a significant role, particularly in vehicles equipped with drum brakes. Understanding how to change brake drums is essential for vehicle owners who prefer to handle their own maintenance. This guide will provide an overview of the process, tools needed, and safety precautions to consider.
Understanding Brake Drums
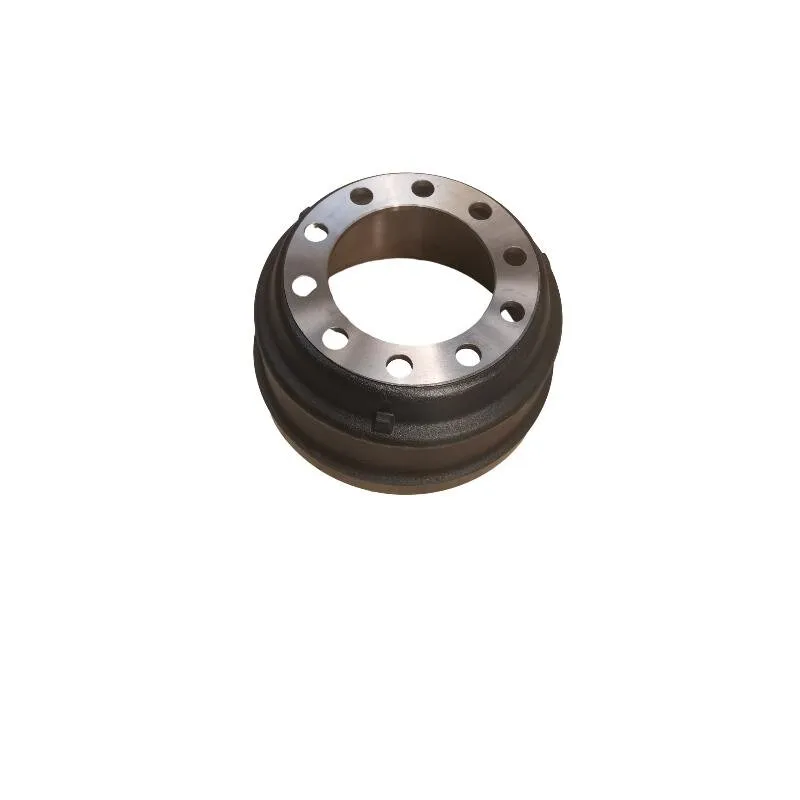
Brake drums are large, cylindrical components that house the brake shoes. When you press the brake pedal, hydraulic pressure pushes the shoes outward against the inner surface of the drum, creating friction that slows down the vehicle. Over time, brake drums can become warped, worn, or damaged, leading to reduced braking efficiency and compromised safety. It’s important to regularly inspect brake drums and replace them as needed.
Tools and Materials Needed
Before embarking on the task of changing brake drums, ensure you have the following tools and materials on hand
1. Jack and Jack Stands To safely elevate the vehicle. 2. Lug Wrench To remove the wheel lug nuts. 3. Brake Drum Puller To help remove stubborn drums. 4. Torque Wrench For properly tightening lug nuts after installation. 5. Replacement Brake Drums Make sure to use drums that are compatible with your vehicle model. 6. Brake Shoe Hardware Kit If the brake shoes also need replacement, a hardware kit may be required. 7. Brake Cleaner To clean components during the process. 8. Safety Gear Such as gloves and goggles.
Step-by-Step Process
1. Preparation Start by ensuring the vehicle is parked on a level surface and the parking brake is engaged. Gather all necessary tools and materials.
2. Elevate the Vehicle Use the jack to lift the vehicle and secure it with jack stands. Never rely solely on the jack for support.
changing brake drums

3. Remove the Wheel Use the lug wrench to loosen and remove the lug nuts, followed by taking off the wheel to expose the brake drum.
4. Inspect the Setup Take a moment to inspect the brake components, including the shoes and hardware. If the shoes show signs of wear, consider replacing them along with the drums.
5. Remove the Brake Drum If the drum is stuck, a brake drum puller may be necessary. This tool will help you safely extract the drum without damaging the surrounding components.
6. Install New Brake Drums Clean the mounting surface with brake cleaner to remove any debris or rust. Place the new drum onto the hub and ensure it fits snugly.
7. Reassemble the Brake Shoes If you removed or replaced brake shoes, attach them according to the manufacturer’s specifications, ensuring all hardware is secure.
8. Reattach the Wheel Carefully place the wheel back onto the hub. Hand-tighten the lug nuts before lowering the vehicle back to the ground.
9. Tighten Lug Nuts Once the vehicle is securely on the ground, use the torque wrench to tighten the lug nuts to the specified torque rating listed in your vehicle’s manual.
10. Final Checks Before taking the vehicle for a test drive, pump the brake pedal a few times to seat the shoes against the new drum. Then check for any unusual noises or issues during your drive.
Conclusion
Changing brake drums is a manageable task for those with a basic understanding of automotive maintenance. Regular inspection and timely replacement of worn components are vital for the safety and performance of your vehicle. Always prioritize safety and when in doubt, consult with a professional mechanic. By following the steps outlined in this guide, you can ensure your braking system remains in top-notch condition, allowing you to enjoy a safe driving experience.
-
Scania Brake Drums: OEM Quality for Optimal Safety & Durability
NewsAug.16,2025
-
R.V.I: Advanced Remote Visual Inspection for Precision
NewsAug.15,2025
-
Discover HYUNDA: Innovative Vehicles, Equipment & Solutions
NewsAug.14,2025
-
R.V.I: Unlock Advanced Insights & Real-time Performance
NewsAug.13,2025
-
Kamaz Brake Drum: Durable & Reliable for Heavy Duty Trucks
NewsAug.12,2025
-
Heavy Duty Iveco Brake Drum - Premium Quality & Safety
NewsAug.11,2025
