Aug . 18, 2024 13:12 Back to list
Essential Guide to Resurfacing Trailer Brake Drums for Enhanced Performance and Safety
Trailer Brake Drum Resurfacing Importance and Process
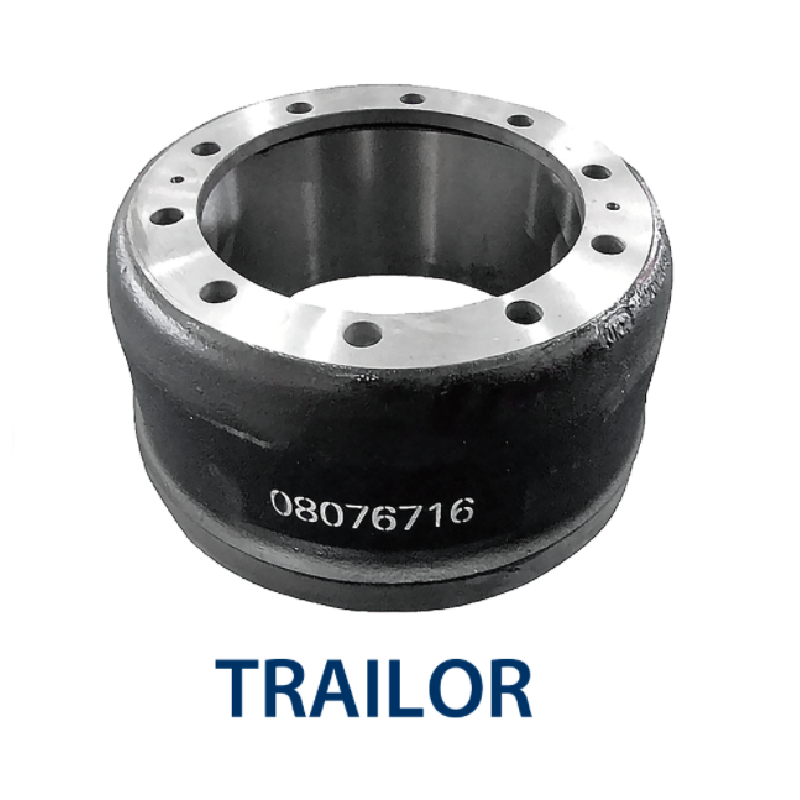
Trailer brake drums play a crucial role in the safety and functionality of a trailer’s braking system. Over time, brake drums can become worn or damaged due to constant friction and heat generated by braking. This wear can lead to decreased braking performance, increased stopping distances, and even total brake failure if not addressed promptly. Therefore, resurfacing brake drums is an essential maintenance procedure for ensuring the safety and efficiency of your trailer.
Understanding Brake Drum Resurfacing
Brake drum resurfacing is a process that involves removing a thin layer of material from the surface of the brake drum. This can help restore the surface to a smooth finish, which enhances the performance of the brake shoes. A smooth, even surface ensures better contact between the brake shoes and the drum, improving stopping power and reducing the likelihood of vibrations, noise, and uneven wear.
When to Re-surface Brake Drums
It is vital to recognize the signs that indicate it may be time for resurfacing your trailer's brake drums. Some common indicators include
1. Vibration If you feel excessive vibrations when applying the brakes, this may be a sign that the drums are warped or uneven. 2. Noise A grinding or squeaking noise during braking can indicate that the brake shoes are making direct contact with a rough surface or that debris has accumulated within the drum. 3. Wear Patterns Visual inspection can reveal uneven wear patterns or scoring on the drum's surface, signaling that resurfacing is necessary. 4. Thickness Issues Drums have a minimum thickness specification. If measurements show that the drum has worn down beyond this limit, it requires resurfacing or replacement.
The Resurfacing Process
trailer brake drum resurfacing

Resurfacing brake drums can be performed by professionals in an automotive shop or by skilled DIY enthusiasts with the right tools. Here’s a brief overview of the resurfacing process
1. Inspection Begin by thoroughly inspecting the brake drum for any cracks, deep grooves, or significant wear. If extensive damage is present, replacement may be necessary instead of resurfacing.
2. Cleaning Remove any grease, brake dust, or debris from the drum surface. A clean working area is essential to achieving the best results.
3. Machining Using a brake lathe, the technician will carefully machine the drum's surface. This involves rotating the drum while a cutting tool shaves off a thin layer of material. The objective is to achieve a smooth, even surface that meets manufacturer specifications.
4. Finishing After machining, the drum should be treated to prevent rust and enhance braking performance. Some professionals may apply a fine finish to enhance the drum's effectiveness further.
5. Reinstallation Once resurfacing is completed, the drum can be reinstalled along with new or resurfaced brake shoes, ensuring everything is correctly aligned and functioning.
Conclusion
Resurfacing trailer brake drums is an essential maintenance task that helps preserve the efficiency and safety of your trailer’s braking system. Regular inspection and timely resurfacing when necessary can prevent costly repairs down the line and ensure that you remain safe on the road. Whether you choose to have this done professionally or tackle the job yourself, understanding the importance of brake drum resurfacing is vital for every vehicle owner who values safety and performance. Always prioritize maintaining your trailer's braking system, and remember that well-functioning brakes are essential for safe towing.
-
Your Brake Drum Man: Premium & Reliable Brake Drums for Sale
NewsAug.18,2025
-
ROR Web Development: Build Fast, Scalable, Secure Apps
NewsAug.17,2025
-
Scania Brake Drums: OEM Quality for Optimal Safety & Durability
NewsAug.16,2025
-
R.V.I: Advanced Remote Visual Inspection for Precision
NewsAug.15,2025
-
Discover HYUNDA: Innovative Vehicles, Equipment & Solutions
NewsAug.14,2025
-
R.V.I: Unlock Advanced Insights & Real-time Performance
NewsAug.13,2025
