Nov . 27, 2024 22:51 Back to list
Guide to Properly Adjusting Brake Drums for Enhanced Vehicle Safety and Performance
How to Adjust Brake Drums A Comprehensive Guide
Braking systems are crucial for vehicle safety, and brake drums play a vital role in the overall functionality of your car's brakes. Regular maintenance and adjustment of brake drums can significantly improve braking performance, enhance safety, and prolong the life of your vehicle. This article will provide a step-by-step guide on how to adjust brake drums effectively.
Understanding Brake Drums
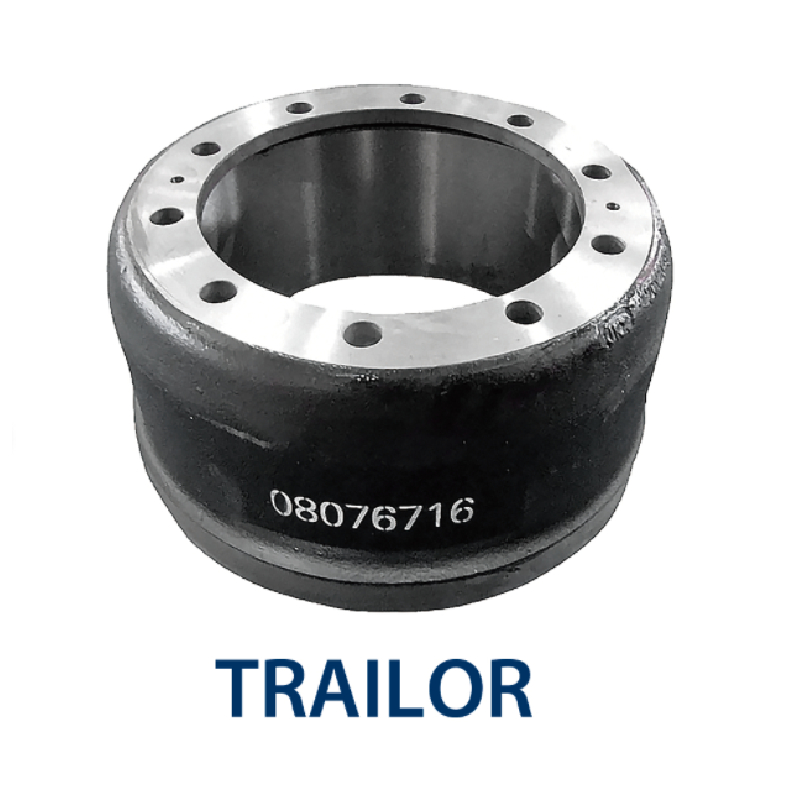
Brake drums operate as part of the drum brake system, which uses friction to slow down or stop a vehicle. When the brake pedal is pressed, brake shoes inside the drum expand against the inner surface to create the necessary friction. Over time, however, brake shoes wear down, and the clearance between the shoes and the drum can change, necessitating adjustments to maintain optimal braking performance.
Tools and Materials Needed
Before beginning the adjustment process, gather the following tools and materials
1. Jack and jack stands – to lift the vehicle 2. Lug wrench – to remove the wheel 3. Brake adjustment tool or a flathead screwdriver 4. Ruler or feeler gauge – for measuring clearance 5. Brake cleaner – for cleaning the drum and shoes 6. Safety glasses and gloves – to protect yourself during the process
Step-by-Step Guide to Adjusting Brake Drums
Step 1 Safety First
Ensuring safety is paramount. Park your vehicle on a level surface, engage the parking brake, and place wheel chocks behind the wheels that will remain on the ground. Always wear safety glasses and gloves while working on your vehicle.
Step 2 Lift the Vehicle
Using the jack, lift the vehicle, making sure it is securely positioned on jack stands. Remove the wheel using a lug wrench to expose the brake drum.
Step 3 Inspect the Brake Drum and Shoes
how to adjust brake drums

Before making adjustments, inspect the brake drum and shoes for wear and damage. Look for cracks, scoring, or excessive wear on the drum's surface. If the drum or shoes are worn beyond acceptable limits, they should be replaced before making adjustments.
Step 4 Clean the Brake Components
Using brake cleaner, spray the inside of the drum and the brake shoes to remove any dust and debris. This will ensure a clean working environment and optimal performance after adjustments.
Step 5 Adjusting the Brake Shoes
Locate the adjustment mechanism, usually found at the bottom of the brake assembly or behind a rubber plug on the back of the drum. Use a brake adjustment tool or flathead screwdriver to turn the adjustment wheel or screw.
To adjust, it should be turned in a direction that expands the shoes. It’s essential to turn the adjuster slowly while checking the clearance between the drum and the shoes frequently. A common method is to pull the drum off while adjusting until just slightly snug, ensuring that the shoes are close to but not dragging against the drum.
Step 6 Test the Adjustment
After the initial adjustment, reassemble the brake drum and wheel. Lower the vehicle back to the ground and pump the brake pedal a few times to reset the brake shoes. Take the vehicle for a short test drive, being attentive to how the brakes feel. The brakes should engage smoothly without any dragging noise or pulling to one side.
Step 7 Reassess if Necessary
If you notice any performance issues during your test drive, you may need to repeat the adjustment process. It might take a few tries to get everything just right, as proper adjustment is key for optimal braking performance.
Conclusion
Adjusting brake drums is a vital aspect of vehicle maintenance that can enhance safety and performance. While it may seem daunting, following these steps can make the process manageable and straightforward. Always prioritize safety and, if you feel unsure about any part of the process, consider seeking help from a professional mechanic. Regular checks and adjustments will keep your braking system functioning efficiently and ensure that you can drive with confidence.
-
Liza Brake Drum: Superior Quality & Performance for Safe Driving
NewsAug.24,2025
-
Iveco Brake Drum | Premium OE Quality for Daily & Eurocargo
NewsAug.22,2025
-
Your Brake Drum Man: Quality & Performance Parts
NewsAug.21,2025
-
Explore Japan: Ultimate Travel Guide & Authentic Experiences
NewsAug.19,2025
-
Your Brake Drum Man: Premium & Reliable Brake Drums for Sale
NewsAug.18,2025
-
ROR Web Development: Build Fast, Scalable, Secure Apps
NewsAug.17,2025
