Nov . 29, 2024 19:54 Back to list
Steps for Effectively Cleaning Brake Drums and Shoes for Optimal Performance
How to Clean Brake Drums and Shoes
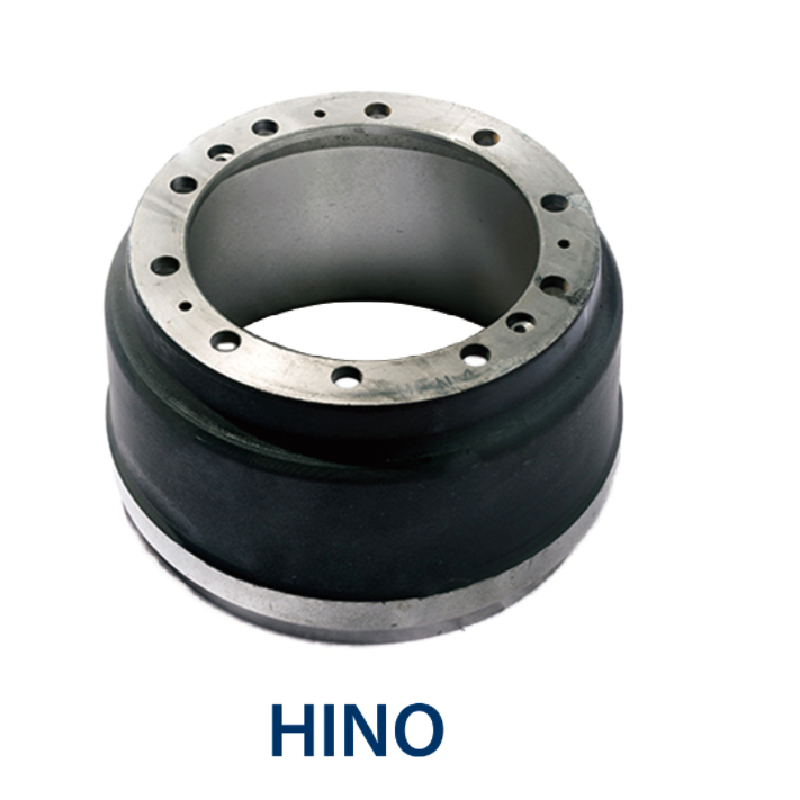
Proper maintenance of your vehicle's braking system is crucial for safety and performance. Among the various components, brake drums and shoes play a vital role in ensuring effective braking. Over time, these components can accumulate dust, debris, and moisture, leading to decreased performance and even potential safety hazards. This article will guide you through the process of cleaning your brake drums and shoes, allowing you to prolong their lifespan and maintain your vehicle's braking efficiency.
Tools and Materials Needed
Before you begin, gather the following tools and materials - Jack and jack stands - Lug wrench - Brake cleaner spray - Soft brushes (e.g., toothbrush or paintbrush) - Clean rags or paper towels - Safety gloves and goggles - Brake shoe spring tool (optional) - Torque wrench (for reassembly)
Step-by-Step Cleaning Process
1. Prepare Your Vehicle - Park your vehicle on a flat, stable surface and engage the parking brake. Before you start working, make sure the engine is off and the keys are removed. - Loosen the lug nuts slightly on the wheel covering the brake drum you plan to clean, but do not remove them yet.
2. Lift the Vehicle - Use a jack to raise the vehicle and then secure it with jack stands. This will provide sufficient access to the wheel and brake components.
3. Remove the Wheel - Finish removing the lug nuts and take off the wheel to expose the brake drum.
4. Inspect the Brake Drums and Shoes - Before cleaning, visually inspect the brake drums and shoes for any signs of wear or damage. Look for cracks, grooves, or excessive wear on the shoes. If any components are in poor condition, they may need to be replaced rather than cleaned.
how to clean brake drums and shoes

5. Remove the Brake Drum - If the drum is stuck, gently tap it with a rubber mallet to loosen it. Be careful not to damage it. Once loose, slide the drum off the hub, revealing the brake shoes underneath.
6. Cleaning the Brake Shoes - Use a soft brush to remove any dust or debris from the brake shoes. Avoid using abrasive materials that might damage the shoe's surface. If there are any oil or grease spots, use brake cleaner to delicately spray and wipe them off with a clean rag.
7. Cleaning the Brake Drum - Spray brake cleaner into the brake drum's interior and wipe it down with a rag to remove any built-up grime. Again, avoid abrasive materials to prevent scratching the surface of the drum.
8. Check the Brake Components - While the drum is off, inspect the springs, adjusters, and other hardware for wear. If necessary, replace any worn-out parts for optimal performance.
9. Reassemble the Brake System - Once everything is clean and inspected, reattach the brake drum and securely fasten it. If you had to remove any springs or hardware, make sure they’re properly in place. Use a torque wrench to tighten the lug nuts to your manufacturer’s specifications when putting the wheel back on.
10. Test the Braking System - Before driving, pump the brake pedal a few times to ensure the brake shoes are properly seated against the drum. This will help in restoring the pedal feel and ensure the brakes are functional before taking the vehicle on the road.
Conclusion
Cleaning brake drums and shoes is a relatively straightforward task that can greatly enhance the performance and longevity of your braking system. Regular maintenance not only helps in maintaining the vehicle’s efficiency but also ensures your safety on the road. If at any point you feel unsure about performing this cleaning yourself, don't hesitate to consult with a professional mechanic. Remember, a well-maintained braking system is essential for a safe driving experience.
-
ROR Web Development: Build Fast, Scalable, Secure Apps
NewsAug.17,2025
-
Scania Brake Drums: OEM Quality for Optimal Safety & Durability
NewsAug.16,2025
-
R.V.I: Advanced Remote Visual Inspection for Precision
NewsAug.15,2025
-
Discover HYUNDA: Innovative Vehicles, Equipment & Solutions
NewsAug.14,2025
-
R.V.I: Unlock Advanced Insights & Real-time Performance
NewsAug.13,2025
-
Kamaz Brake Drum: Durable & Reliable for Heavy Duty Trucks
NewsAug.12,2025
