Nov . 27, 2024 04:26 Back to list
Steps to Safely Remove a Brake Drum from Your Vehicle
How to Get a Brake Drum Off A Step-by-Step Guide
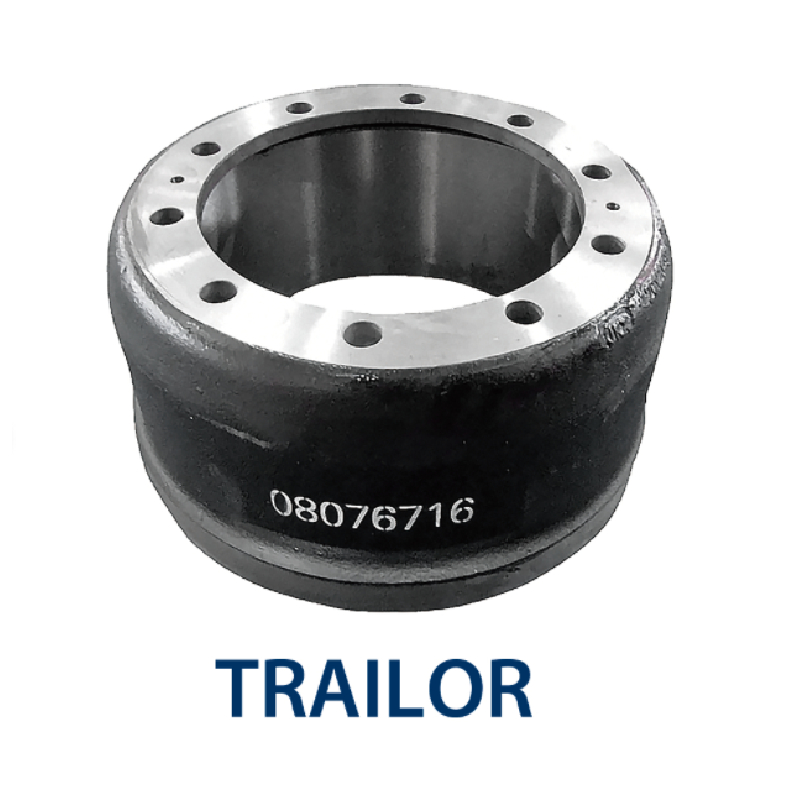
Removing a brake drum can seem intimidating for those unfamiliar with automotive maintenance, but with the right tools and a little bit of know-how, it can be accomplished safely and effectively. This guide will walk you through the process of removing a brake drum, ensuring you have the right equipment and a clear understanding of the steps involved.
Tools and Materials Needed
Before you begin, ensure you have the following tools on hand
1. Jack and Jack Stands For lifting the vehicle securely. 2. Lug Wrench To remove the wheel. 3. Brake Drum Puller A specific tool to help remove stuck brake drums. 4. Rubber Mallet For tapping the drum if needed. 5. Socket Set To remove any bolts retaining the drum. 6. Brake Cleaner To clean the drum and shoes after removal. 7. Safety Glasses and Gloves To protect yourself during the process.
Step-by-Step Instructions
Step 1 Prepare the Vehicle
Begin by parking the vehicle on a flat, stable surface. Engage the parking brake to prevent any movement, and turn off the engine. Before you lift the vehicle, loosen the lug nuts on the wheel corresponding to the brake drum you intend to remove.
Step 2 Lift the Vehicle
Using a jack, lift the car until the wheel is off the ground. Once elevated, place jack stands beneath the vehicle to provide additional support. Never rely solely on a jack for support while working underneath a vehicle.
Step 3 Remove the Wheel
With the vehicle safely supported, remove the lug nuts entirely and take off the wheel. Set it aside in a secure location. This will expose the brake drum and assembly.
how to get a brake drum off

Step 4 Inspect the Brake Drum
Before attempting to remove the drum, check for any retaining screws or clips that might be holding it in place. If you notice any, remove them with your socket set. Sometimes, rust or debris can cause the drum to stick, so inspect for these factors as well.
Step 5 Attempt to Remove the Drum
Try to pull the brake drum straight off the hub. If it comes off easily, great! If not, you may need to tap it gently with a rubber mallet to break any rust free. If the drum is still stuck, you’ll need to resort to using a brake drum puller.
Step 6 Use a Brake Drum Puller
Position the brake drum puller over the drum, ensuring it’s centered. Tighten the puller until it begins to exert pressure on the drum. As you turn the puller’s handle, it should gradually pull the drum off the hub. Make sure you are applying even, steady pressure to avoid damaging the drum.
Step 7 Clean Up
Once the drum is off, inspect the brake shoes and hardware for wear. Use brake cleaner to clean the inside of the drum and the brake components. This will help in maintaining optimal performance when you install the new or resurfaced drum.
Step 8 Reinstallation
If you’re replacing or servicing the drum, follow the reverse procedure for installation. Ensure that all components are securely fitted and that the drum rotates freely without rubbing against the brake shoes.
Conclusion
Removing a brake drum is a task that can be accomplished by anyone willing to follow the right steps and take necessary precautions. By preparing with the proper tools and carefully following each step, you can successfully remove and replace your brake drum, leading to safer driving performance. Always remember to consult your vehicle’s manual for specific instructions related to your make and model, as procedures might vary slightly. With practice, this process will become more intuitive, boosting your confidence in handling automotive repairs.
-
Scania Brake Drums: OEM Quality for Optimal Safety & Durability
NewsAug.16,2025
-
R.V.I: Advanced Remote Visual Inspection for Precision
NewsAug.15,2025
-
Discover HYUNDA: Innovative Vehicles, Equipment & Solutions
NewsAug.14,2025
-
R.V.I: Unlock Advanced Insights & Real-time Performance
NewsAug.13,2025
-
Kamaz Brake Drum: Durable & Reliable for Heavy Duty Trucks
NewsAug.12,2025
-
Heavy Duty Iveco Brake Drum - Premium Quality & Safety
NewsAug.11,2025
