Oct . 19, 2024 01:29 Back to list
how to install wheel studs on brake drums
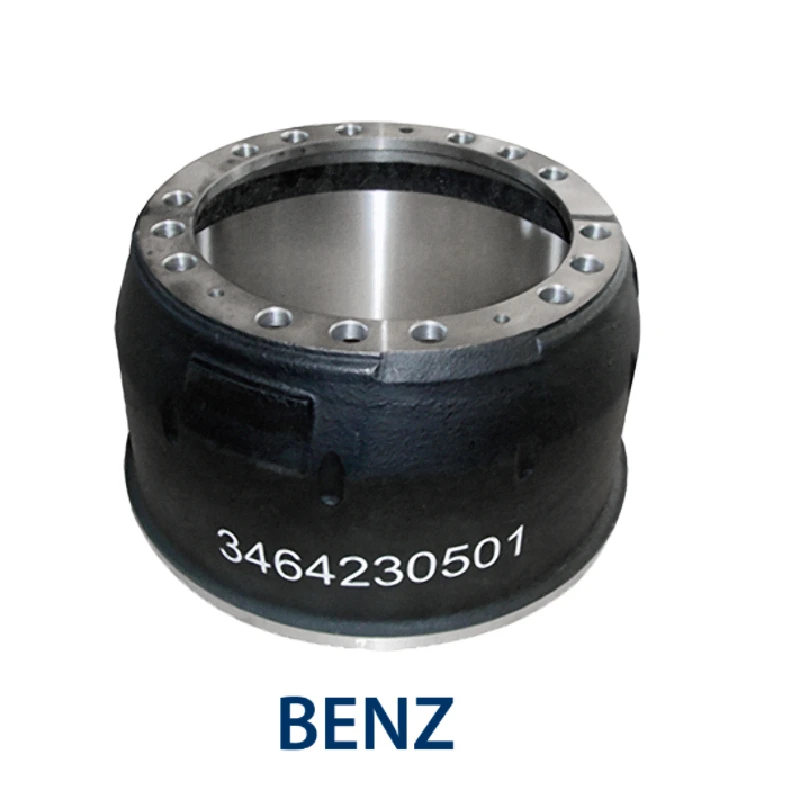
How to Install Wheel Studs on Brake Drums
Wheel studs play a crucial role in the safety and functionality of a vehicle by securing the wheels to the brake drums. Over time, these studs can wear out, become stripped, or even break due to various factors such as corrosion or improper installation. Replacing wheel studs is a task that can be tackled by DIY enthusiasts and seasoned mechanics alike. This guide will provide a step-by-step approach on how to install wheel studs on brake drums effectively.
Tools and Materials Needed
Before you start, gather all the necessary tools and materials
1. New wheel studs 2. A lug nut wrench 3. A hammer or a stud installer tool 4. A socket wrench 5. A jack and jack stands 6. Brake cleaner 7. Anti-seize lubricant (optional) 8. Safety goggles and gloves
Step 1 Preparation and Safety
Ensure your vehicle is parked on a flat, level surface to prevent it from rolling. Engage the parking brake for added safety. Wear safety goggles and gloves to protect yourself during the installation process.
Step 2 Remove the Wheel
Using a lug nut wrench, loosen the lug nuts slightly while the wheel is still on the ground. Then, use the jack to lift the vehicle and place it securely on jack stands. After securing the car, remove the lug nuts completely and take off the wheel to access the brake drum.
Step 3 Remove the Brake Drum
Once the wheel is off, you may need to remove the brake drum. Depending on your vehicle, the drum might be held in place by screws or it might simply slide off after the wheel is removed. If it’s stuck, you can gently tap it with a hammer to loosen it. Make sure to inspect the brake shoes and other components while the drum is off.
Step 4 Inspect the Wheel Studs
Take a close look at the existing wheel studs
. If you notice any that are damaged or stripped, those are the ones you’ll need to replace. If a stud is broken, you will have to remove it entirely before installing a new one.how to install wheel studs on brake drums

Step 5 Remove the Damaged Wheel Studs
To remove a damaged wheel stud, you may need to push it out from the back of the brake drum. If the stud is particularly stubborn, using a hammer to tap it out gently can help. Be careful not to damage the threads on the remaining studs.
Step 6 Installation of New Wheel Studs
Now that you have removed the damaged studs, it’s time to install the new ones. Position the new wheel stud in the hole where the old one was removed. You can apply a bit of anti-seize lubricant to the threads to make future removal easier.
Using a hammer, gently tap the stud from the back of the brake drum until it is seated properly. If you have a stud installer tool, it can make this process a lot easier and more controlled. Make sure the stud is flush with the drum surface.
Step 7 Reinstall the Brake Drum
Once all new wheel studs are installed, you can replace the brake drum. Align the holes on the drum with the new studs, and give it a slight tap if necessary to ensure it fits snugly.
Step 8 Reattach the Wheel
Place the wheel back onto the studs and hand-tighten the lug nuts. Once they are in place, lower the vehicle off the jack stands, and then use the lug nut wrench to tighten the nuts in a star pattern. This ensures even pressure across the wheel.
Step 9 Test Drive
After reinstalling the wheel and lowering the car to the ground, it’s wise to take it for a short test drive. Listen for any unusual noises and check that the wheel is securely in place.
Conclusion
Replacing wheel studs on brake drums may seem challenging, but with the right tools and careful execution, it can be accomplished efficiently. Regular maintenance and timely replacements can help ensure the safety and performance of your vehicle. Always consult your vehicle’s service manual for specific instructions related to your model, and don’t hesitate to seek professional help if needed.
-
Scania Brake Drums: OEM Quality for Optimal Safety & Durability
NewsAug.16,2025
-
R.V.I: Advanced Remote Visual Inspection for Precision
NewsAug.15,2025
-
Discover HYUNDA: Innovative Vehicles, Equipment & Solutions
NewsAug.14,2025
-
R.V.I: Unlock Advanced Insights & Real-time Performance
NewsAug.13,2025
-
Kamaz Brake Drum: Durable & Reliable for Heavy Duty Trucks
NewsAug.12,2025
-
Heavy Duty Iveco Brake Drum - Premium Quality & Safety
NewsAug.11,2025
