Dec . 02, 2024 05:51 Back to list
how to machine brake drums
How to Machine Brake Drums A Comprehensive Guide
Brake drums are crucial components of a vehicle's braking system, especially in older models that utilize drum brakes. Over time, brake drums can wear out, warp, or become out of round due to heat and friction, compromising their performance. Machining brake drums is a process that helps restore their functionality, ensuring proper brake performance and safety. In this guide, we will outline the steps required to machine brake drums effectively.
Understanding Brake Drums
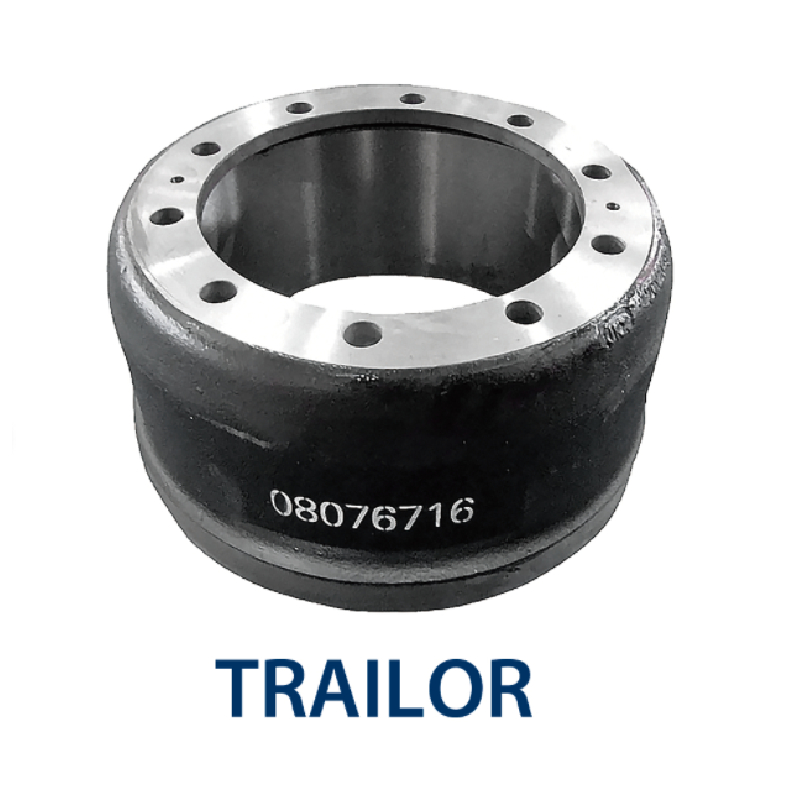
Before diving into the machining process, it is essential to understand what brake drums are and their purpose. A brake drum is a cylindrical component that rotates with the wheel. When brakes are applied, brake shoes push out against the inside surface of the drum, creating friction that slows down the vehicle. A properly functioning drum is essential for maintaining effective braking force and reliability.
When to Machine Brake Drums
Brake drums should be machined when - They show signs of scoring or deep grooves on the surface. - They have become warped due to overheating. - They are out of round, causing uneven contact with brake shoes. - The thickness of the drum has worn down beyond the manufacturer's specifications.
Tools and Equipment Needed
To machine brake drums, you will need the following tools and equipment - A brake lathe (a specialized lathe for machining brake drums and rotors) - Micrometer or caliper for measuring thickness - Brake cleaner and a soft cloth for cleaning - Safety equipment (gloves, goggles, mask) - Dial indicator for checking runout
Step-by-Step Guide to Machining Brake Drums
how to machine brake drums

1. Preparation - Begin by ensuring you have all necessary tools and safety equipment. Clean your workspace to avoid contamination of the brake components. - Remove the wheel and tire to gain access to the brake drum. Disconnect the brake assembly carefully.
2. Inspection - Inspect the drum for visible damage, such as cracks or severe wear. Use a micrometer or caliper to measure the drum's thickness at various points. Make note of the measurements to see if machining is required.
3. Setup the Brake Lathe - Mount the drum onto the lathe securely. Ensure it is aligned correctly to avoid any wobbling during the machining process. Follow the manufacturer’s instructions for setting up the specific brake lathe you are using.
4. Machining Process - Set the lathe to the appropriate speed and feed rate as per the brake drum material. Start the lathe and gently bring the cutting tool into contact with the drum’s inner surface. - Gradually remove material from the drum until a smooth, even surface is achieved. Regularly check the thickness with a micrometer to avoid over-machining, as this could lead to the drum being too thin and unsafe for use.
5. Check for Roundness and Runout - After machining, use a dial indicator to measure the runout of the drum. The runout should be within the specifications recommended by the manufacturer. If it exceeds allowed limits, further adjustments may be necessary.
6. Cleaning - Once the machining is complete, clean the brake drum thoroughly with brake cleaner and a soft cloth to remove any metal shavings or debris. This step is critical for preventing contamination of the brake shoes.
7. Reinstallation - Reinstall the brake drum and reassemble the brake components and wheel. Ensure everything is tightened to the manufacturer's specifications. Test the brakes before taking the vehicle on the road.
Conclusion
Machining brake drums is a critical maintenance procedure that enhances the safety and performance of a vehicle. It requires precision, the right tools, and a good understanding of brake systems. By following the steps outlined in this guide, you can restore the functionality of brake drums and ensure a safer driving experience. Regular inspection and maintenance are essential for prolonging the life of your brake components and vehicle reliability. If you are unsure about the process, consider consulting with a professional mechanic for assistance.
-
Brake Drum Man - High-Quality Drum Brake Drums & Brake Shoes for Reliable Performance
NewsJun.24,2025
-
High-Quality Brake Drum Kamaz – Durable Drum Brake Drum & Brake Shoe Replacement
NewsJun.10,2025
-
High-Quality Brake Drum Liza for Drum Brake Systems - Superior Durability and Performance
NewsJun.10,2025
-
High-Quality Brake Drum Kamaz – Durable Drum Brake Drum & Brake Shoe Solutions
NewsJun.10,2025
-
Durable Kamaz Brake Drums High-Performance Truck Parts
NewsJun.09,2025
-
Premium Brake Drum Maz Kit with Shoes Enhanced Braking
NewsJun.09,2025
