Nov . 19, 2024 01:07 Back to list
how to measure trailer brake drum size
How to Measure Trailer Brake Drum Size
When it comes to ensuring the proper functioning of your trailer’s braking system, knowing the size of the brake drum is crucial. Whether you are replacing old drums, upgrading your brake system, or performing routine maintenance, accurate measurements enable you to select the right parts for optimal safety and performance. This article will guide you through the steps to effectively measure trailer brake drum size.
Understanding Brake Drums
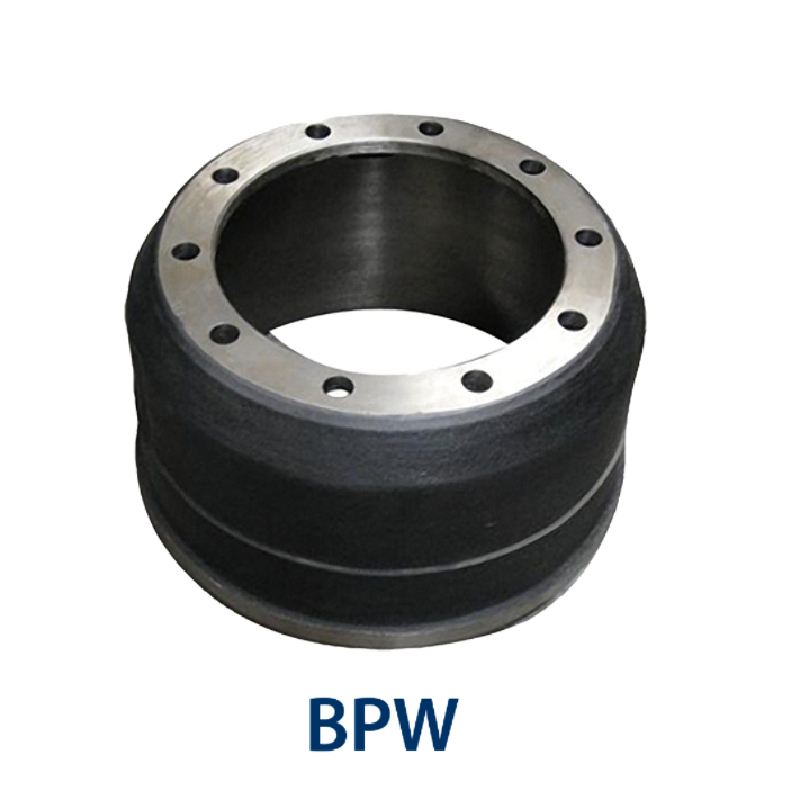
Brake drums are cylindrical components that house the braking mechanism. When the brakes are applied, the brake shoes press against the inside of the drum, creating friction that slows down the trailer. The size of the brake drum can affect how well your trailer stops, as well as other factors such as heat dissipation and overall braking efficiency. Knowing the correct size ensures compatibility with your specific brake assembly.
Tools You Will Need
Before you begin measuring, gather the necessary tools
1. Caliper or Ruler A digital caliper is preferred for precise measurements, but a standard ruler will suffice. 2. Tape Measure For measuring larger dimensions. 3. Marker or Tape To mark measurements if needed. 4. Paper and Pen For taking notes on measurements.
Step-by-Step Measurement Process
1. Remove the Wheel and Drum Start by safely lifting your trailer and removing the wheel. To access the brake drum, you will need to detach the drum from the axle. Depending on your trailer, this may involve removing a few bolts or nuts. Always follow safety procedures to prevent accidents.
how to measure trailer brake drum size

2. Clean the Brake Drum Once the drum is removed, clean the surface with a rag to ensure you can see any markings or measurements clearly. Inspect for any signs of wear or damage that might necessitate replacement.
3. Measure the Diameter To measure the diameter of the brake drum, use a caliper or tape measure. Place the tool across the widest point of the drum’s outer edge. If you are using a ruler, take care to measure from one edge to the direct opposite edge to get the complete diameter. Common sizes for trailer brake drums are 10, 12, and 14.
4. Measure the Width Next, measure the width of the drum. This is done by measuring the distance from one end of the drum to the other at its widest point. Again, using a caliper or a tape measure will give you the most accurate measurement. The width generally ranges from 2 to 3 for most trailer applications.
5. Check the Inner Diameter If you are looking to replace the brake shoes and want to ensure compatibility, you also need to measure the inner diameter of the drum. This is done by measuring the diameter of the inside surface where the brake shoes make contact. Ensure the measurement is taken right where the shoes would press against the drum.
6. Note Down the Measurements Write down all the measurements you took, including the outer diameter, width, and inner diameter. This information will be essential when you go to purchase new parts or consult with a mechanic.
7. Consult with Experts if Necessary If you are uncertain about the measurements or if your drum appears to be non-standard, consult with a professional mechanic or the trailer manufacturer. They can assist in identifying the correct specifications for your brake system.
Conclusion
Properly measuring your trailer’s brake drum size is vital for safety and performance. With the right tools and careful attention to detail, you can accurately determine the size needed for repairs or replacements. Keeping your trailer's braking system in optimal condition not only ensures safe travels but also extends the life of your trailer and its components. By following these steps, you can make informed decisions and maintain your trailer effectively. Remember, when in doubt, seeking professional advice is always a safe choice.
-
Scania Brake Drums: OEM Quality for Optimal Safety & Durability
NewsAug.16,2025
-
R.V.I: Advanced Remote Visual Inspection for Precision
NewsAug.15,2025
-
Discover HYUNDA: Innovative Vehicles, Equipment & Solutions
NewsAug.14,2025
-
R.V.I: Unlock Advanced Insights & Real-time Performance
NewsAug.13,2025
-
Kamaz Brake Drum: Durable & Reliable for Heavy Duty Trucks
NewsAug.12,2025
-
Heavy Duty Iveco Brake Drum - Premium Quality & Safety
NewsAug.11,2025
