Dec . 18, 2024 23:59 Back to list
Steps to Remove Brake Drum Safely and Effectively for Your Vehicle Maintenance
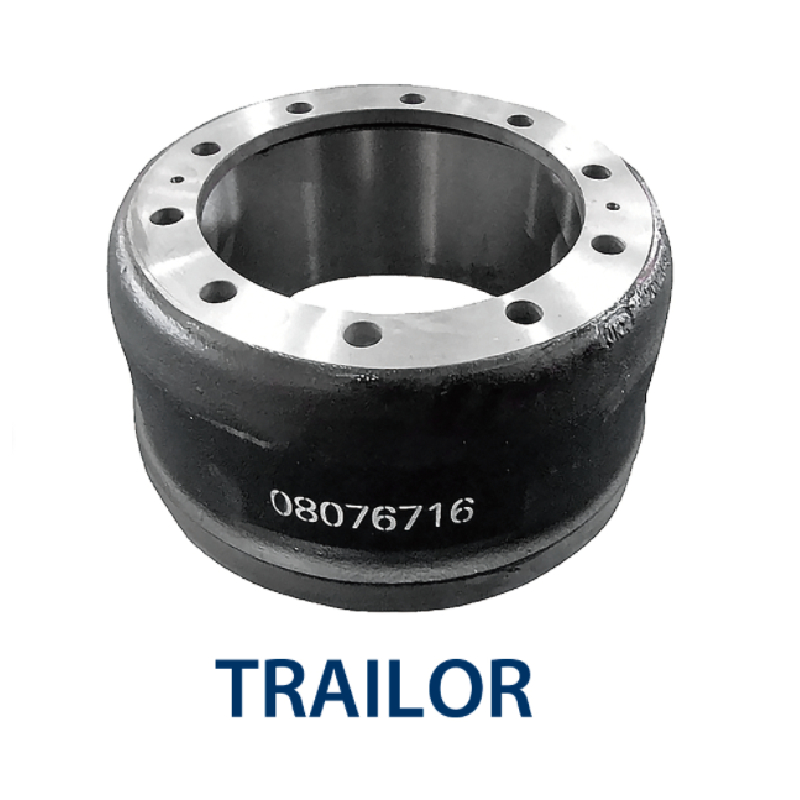
How to Take Off a Brake Drum A Step-by-Step Guide
Removing a brake drum might seem intimidating at first, but with the right tools and a bit of patience, it's a task that can be accomplished by most DIY enthusiasts. Whether you're looking to perform a brake inspection, replace worn pads, or simply clean the braking system, understanding the proper technique is essential. In this guide, we’ll walk you through the steps to safely and effectively remove a brake drum.
Tools and Materials Needed
Before you start, make sure you have the following tools and materials
- Safety gloves and goggles - Jack and jack stands - Lug wrench - Brake drum puller (if necessary) - Basic hand tools (screwdriver, pliers, etc.) - Brake cleaner (optional) - Rags or shop towels
Step 1 Safety First
Before you begin working on your vehicle, ensure that it is parked on a level surface and that the parking brake is engaged. Always wear safety gloves and goggles to protect yourself from dirt, debris, and any sharp edges.
Step 2 Loosen Wheel Lug Nuts
Using a lug wrench, slightly loosen the lug nuts on the wheel that has the brake drum you want to remove. Do not remove them completely at this stage—just break their initial resistance.
Step 3 Raise the Vehicle
Using a jack, raise the vehicle to a height that allows you to work comfortably. Once the vehicle is elevated, securely place jack stands under the vehicle to ensure stability. Never rely solely on the jack for support.
Step 4 Remove the Wheel
Now that your vehicle is safely supported, remove the lug nuts completely and take off the wheel. Set the wheel aside in a safe location where it won’t get damaged.
how to take off brake drum

Step 5 Inspect the Brake Assembly
With the wheel removed, you should have a clear view of the brake assembly. Inspect it for any obvious signs of wear or damage to the brake shoes or hardware.
Step 6 Remove the Brake Drum
To remove the brake drum, you may need to remove the retaining screws (if equipped). If the brake drum is stuck due to rust or debris, it may require a bit of force.
1. Gentle Tapping Tap around the drum’s edges with a rubber mallet. This can help loosen any rust that may be binding the drum to the hub.
2. Use a Brake Drum Puller If the drum still doesn’t budge after tapping, you might need to use a brake drum puller. Place the puller arms on the back of the drum and tighten the center bolt gradually. This will apply even pressure and should help pull the drum off without damaging it.
3. Check for Retaining Springs If the drum still does not come off, double-check for any retaining springs or clips that may be securing it in place.
Step 7 Clean and Inspect
Once the drum is removed, take the opportunity to clean it and inspect the brake shoes and the drum’s inner surface for wear or damage. If the shoe lining is excessively worn or if there are deep grooves in the drum, it may be time for replacement.
Step 8 Reinstallation
Reinstallation is the reverse of removal. Make sure to clean any rust or debris from the hub before sliding the drum back into place. Reattach the wheel, lower the vehicle, and torque the lug nuts to the manufacturer’s specifications.
Conclusion
Removing a brake drum is a straightforward process that can save you time and money on vehicle maintenance. By following these steps and taking proper safety precautions, you can successfully complete the job. Always consult your vehicle’s manual for specific instructions related to your make and model, and don’t hesitate to seek professional help if needed. Happy wrenching!
-
ROR Web Development: Build Fast, Scalable, Secure Apps
NewsAug.17,2025
-
Scania Brake Drums: OEM Quality for Optimal Safety & Durability
NewsAug.16,2025
-
R.V.I: Advanced Remote Visual Inspection for Precision
NewsAug.15,2025
-
Discover HYUNDA: Innovative Vehicles, Equipment & Solutions
NewsAug.14,2025
-
R.V.I: Unlock Advanced Insights & Real-time Performance
NewsAug.13,2025
-
Kamaz Brake Drum: Durable & Reliable for Heavy Duty Trucks
NewsAug.12,2025
