Dec . 10, 2024 07:50 Back to list
remove brake drum
Removing Brake Drum A Step-by-Step Guide
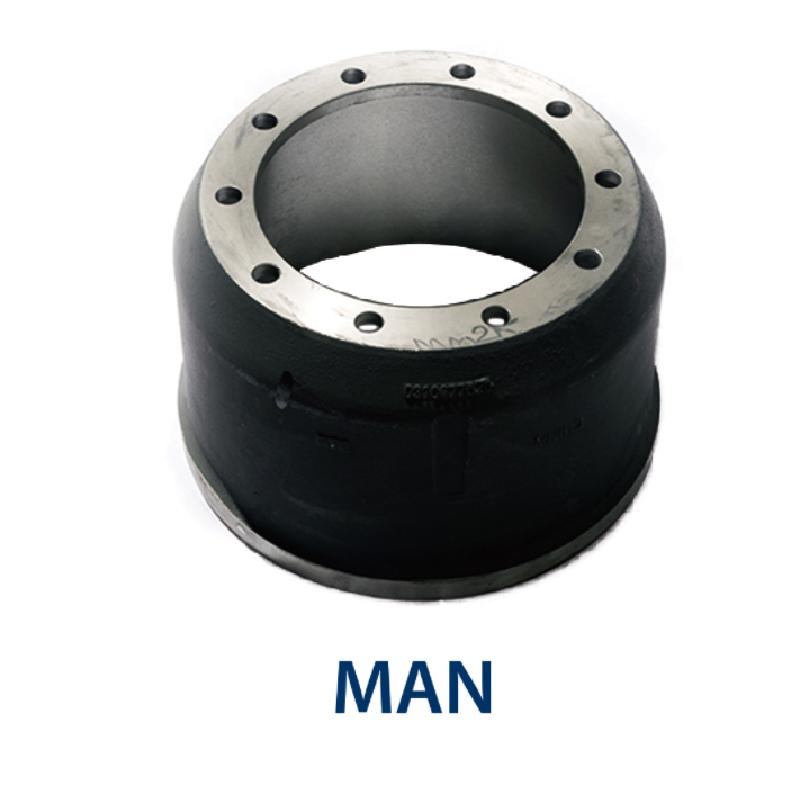
Brake drums are a crucial component of a vehicle's braking system, particularly in older models and certain types of trucks and trailers. The proper functionality of brake drums ensures effective stopping power and safety while driving. However, over time, they may require maintenance, adjustment, or replacement due to wear and tear. Removing a brake drum can be a daunting task for those unfamiliar with automotive repair, but with the right guidance, it can be accomplished with relative ease. This article provides a comprehensive step-by-step guide on how to remove a brake drum safely and effectively.
Tools and Preparation
Before embarking on the removal process, ensure you have the necessary tools at hand. The essential tools include
1. Jack and Jack Stands To lift the vehicle securely. 2. Lug Wrench For removing the wheel and lug nuts. 3. Brake Drum Tool Sometimes a specialized tool may be needed to help remove the drum. 4. Pliers To manage brake components. 5. Screwdriver For prying or adjusting parts. 6. Cleansing Agent To clean the brake components post-removal.
Before starting the process, ensure you are wearing safety goggles and gloves. Also, park the vehicle on a flat, stable surface and ensure it is turned off with the parking brake engaged to prevent rolling.
Step 1 Lift the Vehicle
Once you’ve gathered all essential tools, the first step is to lift the vehicle. Using a jack, raise the vehicle and secure it with jack stands. This ensures that the vehicle remains stable as you work on it.
Step 2 Remove the Wheel
Next, take the lug wrench and loosen the lug nuts holding the wheel in place. It is often easier to do this while the vehicle is still on the ground. Once the nuts are loosened, completely remove them and take off the wheel, exposing the brake assembly and the brake drum.
Step 3 Inspect the Brake Assembly
remove brake drum

With the wheel removed, take a moment to inspect the brake assembly. Look for any obvious signs of wear or damage, such as cracked shoes or leaking brake fluid. This inspection can help you assess whether additional repairs will be necessary once the brake drum is removed.
Step 4 Remove the Brake Drum
Now, you can begin to remove the brake drum. In many cases, brake drums can be pulled straight off. However, if the drum is stuck, it could be due to rust or dirt buildup. In this case, gently tap the drum with a rubber mallet around its circumference to help loosen it. If it still doesn’t come off, consult your vehicle's service manual for specific instructions, as some models may have retaining screws or clips that need to be removed first.
Step 5 Clean the Area
Once the brake drum is removed, take the opportunity to clean the area. Use a cleansing agent to wipe away any dust, grease, or debris. Cleaning the brake components helps ensure that any new parts you install will function properly and enhances the overall efficiency of the braking system.
Step 6 Inspect the Drum and Brake Shoes
After removal and cleaning, inspect the condition of the brake drum and shoes. Measure the drum's inner diameter to ensure it is within specifications, as oversized drums can impair braking performance. If you notice deep grooves or cracks, replacing the drum may be necessary. Similarly, inspect the brake shoes for thickness and wear. A professional may be able to resurface a usable drum, but if the shoes are worn down, they will need to be replaced.
Step 7 Reinstallation and Finishing Up
After all inspections and necessary replacements are complete, it's time to reinstall the brake drum. Align it with the shoes and push it firmly into place until it is seated correctly. Reattach the wheel and tighten the lug nuts in a star pattern to ensure even tightening. Finally, lower the vehicle and remove the jack stands.
Conclusion
Removing a brake drum can feel intimidating, especially for beginners, but by following these steps, you can manage the process safely and effectively. Regular maintenance of your vehicle's brake system not only ensures safety but also extends the lifespan of brake components. If you ever feel unsure, don’t hesitate to consult a professional mechanic to assist you. Safe driving begins with well-maintained brakes!
-
Scania Brake Drums: OEM Quality for Optimal Safety & Durability
NewsAug.16,2025
-
R.V.I: Advanced Remote Visual Inspection for Precision
NewsAug.15,2025
-
Discover HYUNDA: Innovative Vehicles, Equipment & Solutions
NewsAug.14,2025
-
R.V.I: Unlock Advanced Insights & Real-time Performance
NewsAug.13,2025
-
Kamaz Brake Drum: Durable & Reliable for Heavy Duty Trucks
NewsAug.12,2025
-
Heavy Duty Iveco Brake Drum - Premium Quality & Safety
NewsAug.11,2025
