Aug . 07, 2024 14:15 Back to list
Steps for Safely Removing a Brake Drum and Inspecting Brake Components for Maintenance
Removing Brake Drum A Step-by-Step Guide
The brake system of your vehicle is crucial for ensuring your safety on the road. Over time, brake drums can wear down or become corroded, leading to decreased braking performance. If you've decided to remove and possibly replace or inspect your brake drum, it’s essential to follow the right steps to ensure safety and efficiency. Here’s a guide to help you through the process of removing a brake drum.
Tools and Materials Needed
Before you begin, ensure you have the following tools and materials
- A jack and jack stands - Lug wrench - Brake drum puller (if necessary) - Cleaning supplies (brake cleaner, rag) - Lubricant (silicone-based grease) - Safety glasses and gloves
Step 1 Safety First
Always prioritize safety. Ensure that you are working in a well-lit area, and wear safety glasses and gloves to protect yourself from debris. Park your vehicle on a flat surface and engage the parking brake to prevent any movement while you work.
Step 2 Loosen the Lug Nuts
Using a lug wrench, loosen the lug nuts on the wheel corresponding to the brake drum you intend to remove. Do not remove them entirely at this stage—just loosen them enough to make it easier when the wheel is lifted off the ground.
Step 3 Lift the Vehicle
Position a jack under the vehicle’s manufacturer-recommended lifting point, and carefully raise the vehicle until the wheel is off the ground. Once elevated, secure the vehicle with jack stands for stability.
Step 4 Remove the Wheel
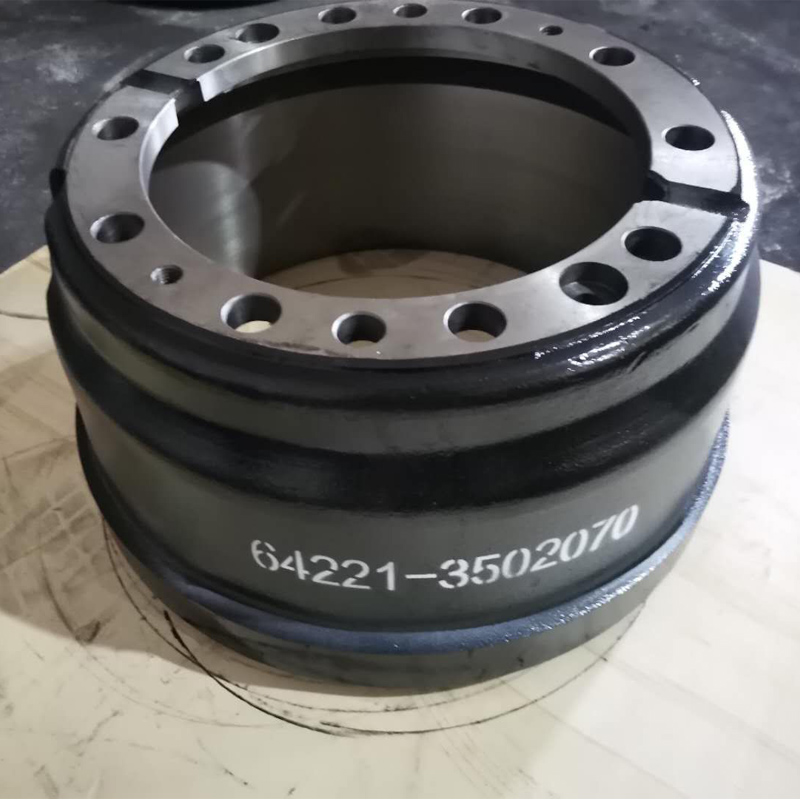
removing brake drum

Now that the vehicle is secure, finish removing the loosened lug nuts and take off the wheel
. Set the wheel aside in a safe location where it won’t be damaged.Step 5 Inspect the Brake Assembly
Before removing the brake drum, take a moment to inspect the brake components. Look for any signs of wear or damage on the brake shoes, springs, and other associated parts. This inspection will help you determine if any other parts need attention.
Step 6 Remove the Brake Drum
In many cases, the brake drum can be removed easily by pulling it straight off the wheel hub. However, if it’s stuck due to rust or debris, you may need to use a brake drum puller. Attach the puller correctly and turn the handle to apply pressure. This method ensures that you do not damage the drum or the hub during removal.
Once the drum is free, carefully slide it off the hub. Be cautious of any loose debris that may fall as you remove it and avoid getting any dirt into the brake components.
Step 7 Clean and Inspect
With the brake drum removed, take the opportunity to clean the inner surface of the drum and inspect it for scoring or excessive wear. If the drum is damaged beyond a resurfacing, replacement might be necessary. Similarly, check the condition of the brake shoes, springs, and any associated hardware.
Step 8 Reinstallation
If you’re planning to reinstall the same drum after inspection or maintenance, simply reverse the removal process. Apply a thin layer of lubricant to the mating surfaces to prevent sticking in the future. Once you’ve ensured that everything is in good condition and correctly installed, put the wheel back on and tighten the lug nuts in a crisscross pattern for even pressure.
Conclusion
Removing a brake drum may seem daunting at first, but with the right tools and careful attention to safety, it can be a manageable process. Regular maintenance can prolong the life of your brake components and improve safety on the road. If you ever feel uncertain, it’s advisable to consult with a professional mechanic. Taking care of your vehicle's brake system is not just about performance; it’s about ensuring your safety and that of others on the road.
-
ROR Web Development: Build Fast, Scalable, Secure Apps
NewsAug.17,2025
-
Scania Brake Drums: OEM Quality for Optimal Safety & Durability
NewsAug.16,2025
-
R.V.I: Advanced Remote Visual Inspection for Precision
NewsAug.15,2025
-
Discover HYUNDA: Innovative Vehicles, Equipment & Solutions
NewsAug.14,2025
-
R.V.I: Unlock Advanced Insights & Real-time Performance
NewsAug.13,2025
-
Kamaz Brake Drum: Durable & Reliable for Heavy Duty Trucks
NewsAug.12,2025
