Jul . 30, 2024 02:43 Back to list
Tips for Proper Adjustment of Rear Brake Drum to Enhance Vehicle Safety and Performance
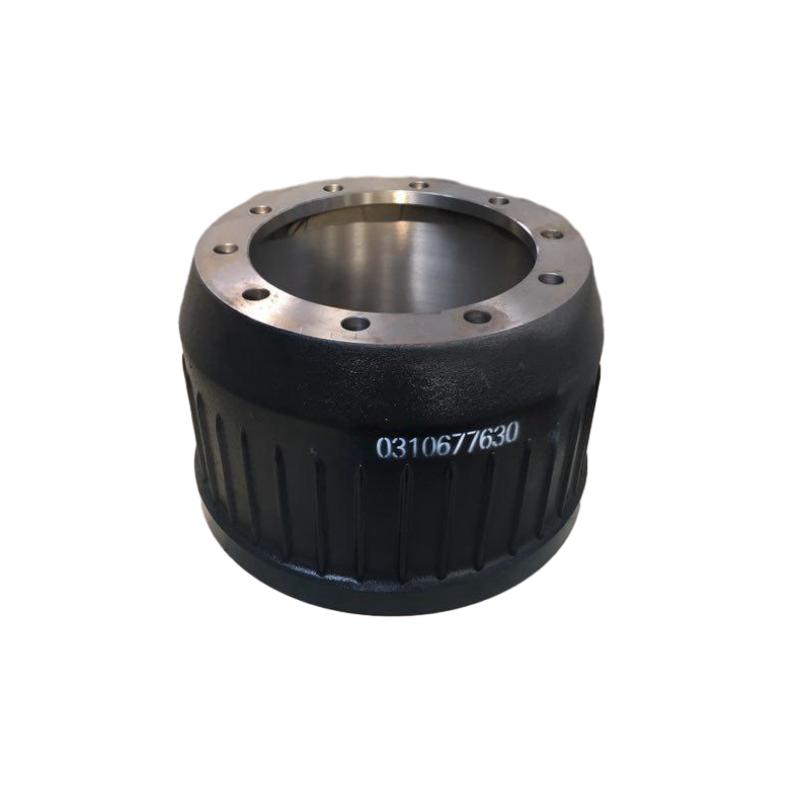
Rear Brake Drum Adjustment Ensuring Optimal Performance and Safety
The brake system of a vehicle is paramount for the safety and reliability of both the driver and passengers. Among the various components of this critical system, the rear brake drum plays a significant role in ensuring smooth and effective braking. Proper adjustment of the rear brake drum is essential not only for optimal performance but also for prolonging the life of the braking system.
Understanding the Brake Drum System
The rear brake drum system operates on a relatively straightforward principle. When the driver presses the brake pedal, hydraulic pressure forces the brake shoes against the inner surface of the drum, creating friction that slows down the vehicle. Over time, as the brake shoes wear down, the distance between the shoes and the drum increases, resulting in diminished braking performance and increased stopping distances.
Importance of Brake Drum Adjustment
Adjusting the rear brake drum is crucial for maintaining the vehicle's braking efficiency. If the drum is too loose, the brake shoes may not make sufficient contact, leading to ineffective braking and potential safety hazards. On the other hand, if the drum is too tight, it can cause premature wear of the brake shoes and overheating, which can compromise their effectiveness.
Furthermore, proper adjustment ensures even wear on the brake components. Uneven wear can lead to an imbalanced braking system that affects the vehicle's handling and stability, particularly during sudden stops or adverse weather conditions. Regular adjustment of the brake drum is therefore essential to uphold the vehicle's overall safety.
How to Adjust the Rear Brake Drum
rear brake drum adjustment

Adjusting the rear brake drum can be performed by vehicle owners with a basic understanding of mechanical systems or by a professional technician. Here are the steps typically involved in the adjustment process
1. Preparation Start by ensuring the vehicle is parked on a level surface, and engage the parking brake for safety. Gather the necessary tools, including a jack, jack stands, wrenches, and a brake adjustment tool.
2. Remove the Wheel Loosen the lug nuts and safely lift the vehicle using a jack. Secure it with jack stands and remove the wheel to gain access to the brake drum.
3. Inspect the Brake Shoes and Drum Before making adjustments, thoroughly examine the brake shoes for wear and the drum for any grooves or damage. If the shoes are excessively worn or the drum is damaged, replacement may be necessary.
4. Adjust the Brake Shoes Using the brake adjustment tool, turn the adjuster mechanism until the brake shoes just touch the inner surface of the drum. Ensure they do not drag excessively, which could lead to overheating.
5. Reassemble and Test Once the adjustment is made, reassemble the wheel and lower the vehicle. Test the brake pedal for firmness and perform a road test to ensure proper braking performance.
Conclusion
Regular maintenance and adjustment of the rear brake drum are vital for ensuring the safety and efficiency of your vehicle. Not only does it help in achieving better braking performance, but it also extends the lifespan of the brake components, saving you money in the long run. Whether performed by a professional or DIY enthusiast, understanding the adjustment process is crucial for every vehicle owner. Remember, brakes are one of the most vital systems in a vehicle, and their proper function can significantly impact overall road safety. Prioritize your brake maintenance, and drive safely!
-
ROR Web Development: Build Fast, Scalable, Secure Apps
NewsAug.17,2025
-
Scania Brake Drums: OEM Quality for Optimal Safety & Durability
NewsAug.16,2025
-
R.V.I: Advanced Remote Visual Inspection for Precision
NewsAug.15,2025
-
Discover HYUNDA: Innovative Vehicles, Equipment & Solutions
NewsAug.14,2025
-
R.V.I: Unlock Advanced Insights & Real-time Performance
NewsAug.13,2025
-
Kamaz Brake Drum: Durable & Reliable for Heavy Duty Trucks
NewsAug.12,2025
