Oct . 05, 2024 14:56 Back to list
trailer brake drum replacement
Trailer Brake Drum Replacement A Comprehensive Guide
When it comes to trailer maintenance, few components are as crucial as the brake system. A well-functioning brake system ensures safety on the road, especially with heavy loads. One of the essential parts of this system is the brake drum. Over time, brake drums can wear out or become damaged, requiring replacement. This article will guide you through the process of trailer brake drum replacement, ensuring your trailer remains safe and reliable.
Understanding Brake Drums
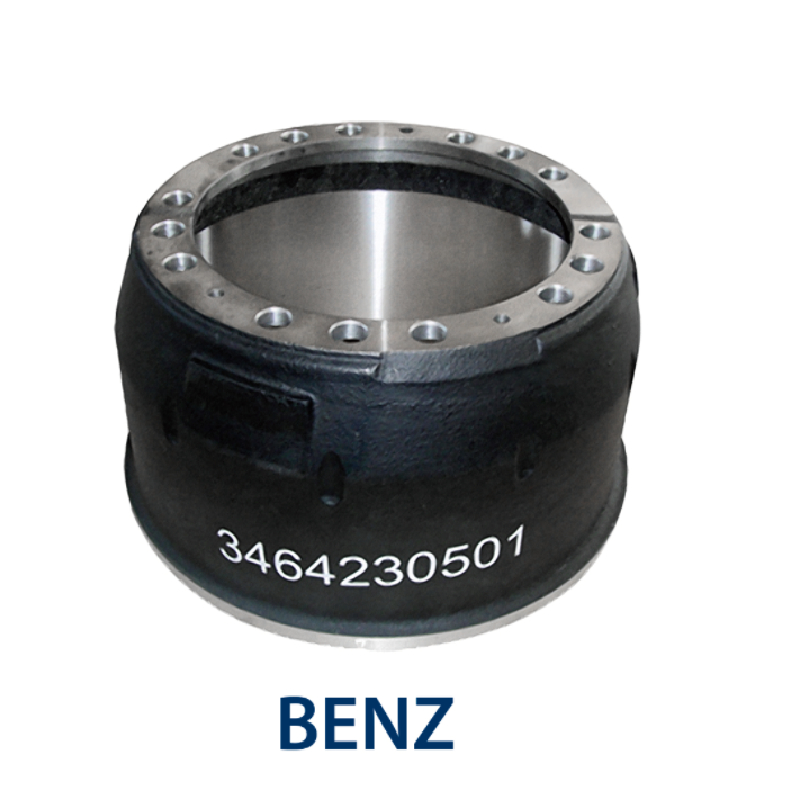
Brake drums are circular metal components that house the brake shoes. When you press the brake pedal, the shoes expand outward against the drum, creating friction that slows down or stops the trailer. Despite being robust, brake drums can experience wear due to heat, friction, and environmental factors. Common signs that indicate the need for replacement include unusual noises while braking, decreased braking efficiency, and visible cracks or grooves on the drum surface.
Tools Required for Replacement
To replace the brake drum, you will need several tools, including
1. Jack and Jack Stands For lifting the trailer safely. 2. Lug Wrench To remove the wheel. 3. Brake Tool Kit This may include pliers, screwdrivers, and a brake shoe spreader. 4. Torque Wrench To ensure bolts are tightened to specifications. 5. New Brake Drums Purchase matching drums based on your trailer’s specifications.
Step-by-Step Replacement Process
1. Safety First Make sure to park your trailer on a flat surface and engage the parking brake. Use wheel chocks to prevent rolling.
2. Lift the Trailer Use a jack to raise the trailer and then place jack stands under it for support.
trailer brake drum replacement

3. Remove the Wheel Use the lug wrench to loosen and remove the wheel from the axle. Be sure to keep the lug nuts in a safe place.
4. Inspect the Brake Assembly With the wheel removed, you will have access to the brake assembly. Check for any obvious signs of wear on the brake shoes and other components.
5. Remove the Brake Drum Depending on your trailer, the drum may be held in place by retaining screws or clips. Remove these components carefully and slide the drum off the hub. If it's stuck, tapping gently around the circumference with a rubber mallet can help loosen it.
6. Replace the Drum Take your new brake drum and slide it onto the hub. Ensure that it fits snugly and is free of any obstructions. Reattach the retaining screws or clips.
7. Reassemble the Brake Assembly If you had to remove the brake shoes to access the drum, make sure to reinstall them according to the manufacturer's specifications. It's a good opportunity to inspect them for wear as well.
8. Reattach the Wheel Place the wheel back onto the axle and hand-tighten the lug nuts. Once they are in place, lower the trailer back to the ground using the jack and then tighten the lug nuts in a star pattern to ensure even pressure.
9. Test the Brakes Before taking the trailer on the road, it’s critical to test the brakes. Conduct a gentle test to ensure everything is functioning correctly.
Final Thoughts
Replacing the brake drums on your trailer may seem daunting, but with the right tools and a bit of patience, it can be done effectively. Regular maintenance and timely replacement of worn brake components are vital for safe towing experiences. Always refer to your trailer’s user manual for specific instructions and safety precautions. If you feel uncomfortable performing this task, don’t hesitate to seek professional assistance. A well-maintained brake system not only ensures compliance with road safety regulations but also enhances your confidence while driving on the road. Remember, safety should always come first, especially when towing heavy loads.
-
Your Brake Drum Man: Premium & Reliable Brake Drums for Sale
NewsAug.18,2025
-
ROR Web Development: Build Fast, Scalable, Secure Apps
NewsAug.17,2025
-
Scania Brake Drums: OEM Quality for Optimal Safety & Durability
NewsAug.16,2025
-
R.V.I: Advanced Remote Visual Inspection for Precision
NewsAug.15,2025
-
Discover HYUNDA: Innovative Vehicles, Equipment & Solutions
NewsAug.14,2025
-
R.V.I: Unlock Advanced Insights & Real-time Performance
NewsAug.13,2025
