ਜੁਲਾਈ . 29, 2024 23:01 Back to list
Effective Methods for Removing Rust and Maintaining Brake Drums for Optimal Performance and Safety
Cleaning Rusty Brake Drums A Comprehensive Guide
Rust is an inevitable foe for many automotive parts, and brake drums are no exception. These vital components play a crucial role in the safety and performance of your vehicle, so regular maintenance is essential. This guide will provide you with a step-by-step process for cleaning rusty brake drums, ensuring they function effectively and enhancing the longevity of your vehicle.
Understanding Brake Drums
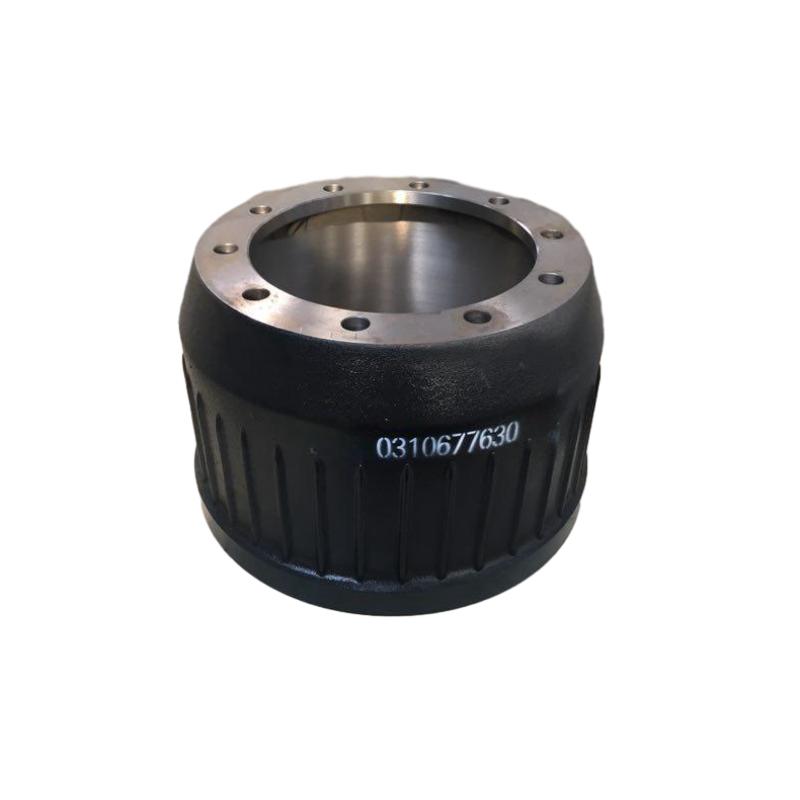
Brake drums are cylindrical components that house the brake shoes, which press against the inner surface of the drum to create friction and slow down the vehicle. Because they are often exposed to moisture, road salt, and debris, they can develop rust over time. If not addressed, rust can hinder braking performance, leading to both safety risks and costly repairs. Therefore, cleaning rusty brake drums is a task that should not be overlooked.
Tools and Materials Needed
Before you begin the cleaning process, gather the following tools and materials
- Jack and jack stands - Wheel chocks - Lug wrench - Wire brush or rust remover - Sandpaper (medium and fine grit) - Brake cleaner - Safety goggles and gloves - Rags or paper towels
Step-by-Step Cleaning Process
1. Safety First
Begin by ensuring your vehicle is parked on a level surface. Engage the parking brake and place wheel chocks behind the rear wheels. Wearing safety goggles and gloves is essential to protect yourself during the cleaning process.
Using a jack, lift the vehicle and secure it with jack stands. Remove the wheel that covers the brake drum using a lug wrench. This will provide you clear access to the brake drum.
cleaning rusty brake drums

3. Inspect the Brake Drum
Once the wheel is removed, inspect the brake drum for severe rust damage. If the rust is extensive, it may be worth consulting a professional or considering a replacement. For minor rust buildup, proceed with the following steps.
4. Scrub the Drum
Using a wire brush, scrub the rusty areas of the brake drum to remove rust and debris. If necessary, apply a rust remover for enhanced efficiency. Be gentle to avoid damaging the drum’s surface.
5. Sand the Drum
Once the bulk of the rust is removed, use medium-grit sandpaper to smooth out any rough spots. Follow this with fine-grit sandpaper to create a smoother finish. This step will ensure better contact between the brake shoes and the drum, optimizing braking performance.
6. Clean the Drum
After sanding, use brake cleaner to wipe down the drum thoroughly. This removes any dust, grime, or remnants of rust particles. Make sure the surface is completely dry before reassembling.
7. Reassemble and Test
Once the drum is clean and dry, reinstall the wheel and lower the vehicle. Tighten the lug nuts in a criss-cross pattern to ensure even pressure. After lowering the vehicle completely, give the brake pedal a few pumps to ensure proper contact is established between the shoes and the drum.
Conclusion
Cleaning rusty brake drums is a vital maintenance task that can enhance your vehicle's safety and performance. By following the steps outlined above, you can address minor rust issues effectively. Always prioritize safety and consult a professional if you encounter extensive rust damage or are unsure about any of the procedures. Regular maintenance not only prolongs the life of your brake components but also ensures a safer driving experience. Remember, taking care of your brakes is taking care of your life on the road.
-
Brake Drum Man - High-Quality Drum Brake Drums & Brake Shoes for Reliable Performance
NewsJun.24,2025
-
High-Quality Brake Drum Kamaz – Durable Drum Brake Drum & Brake Shoe Replacement
NewsJun.10,2025
-
High-Quality Brake Drum Liza for Drum Brake Systems - Superior Durability and Performance
NewsJun.10,2025
-
High-Quality Brake Drum Kamaz – Durable Drum Brake Drum & Brake Shoe Solutions
NewsJun.10,2025
-
Durable Kamaz Brake Drums High-Performance Truck Parts
NewsJun.09,2025
-
Premium Brake Drum Maz Kit with Shoes Enhanced Braking
NewsJun.09,2025
