Жов . 02, 2024 20:08 Back to list
Guidelines for Replacing Brake Drums Effectively and Safely in Your Vehicle
Replacing Brake Drums A Comprehensive Guide
Brake drums are crucial components in a vehicle's braking system, particularly in older models that employ drum brakes rather than disc brakes. Understanding when and how to replace brake drums can significantly enhance your vehicle's safety and performance. This article discusses the importance of brake drums, signs that they need replacement, and a step-by-step guide for replacing them.
Importance of Brake Drums
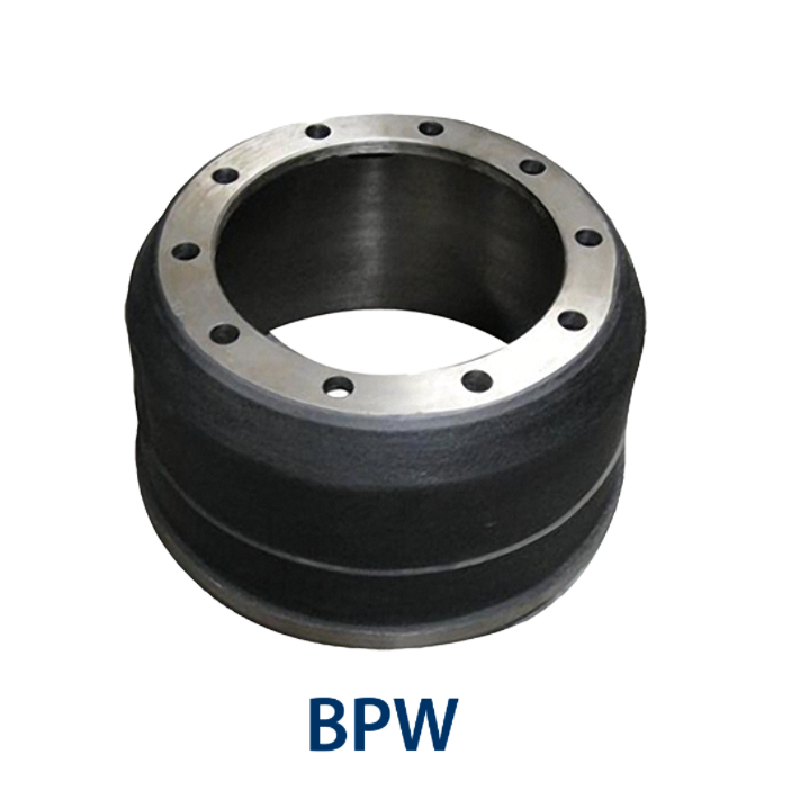
Brake drums house the brake shoes and are an integral part of the braking process. When you press the brake pedal, hydraulic force pushes the brake shoes against the inside of the drum. This friction slows down the wheel, allowing the vehicle to stop. Over time, brake drums can wear out due to friction, corrosion, or other forms of degradation. This can lead to decreased braking efficiency and, in some cases, brake failure. Regular inspections and timely replacements are essential for maintaining a vehicle’s safety.
Signs that Brake Drums Need Replacement
Recognizing the signs of worn-out brake drums can save you from potential accidents. Here are some common indicators
1. Squeaking or Grinding Noises If you hear a squeaking noise when you brake, it may be a sign that the brake shoes are wearing thin. A grinding noise could indicate that the shoes have worn down completely and are damaging the drum.
2. Vibration or Pulsation If you feel the steering wheel vibrating or pulsating when you apply the brakes, it may be a sign of warped brake drums.
3. Reduced Braking Performance If your vehicle takes longer to stop or the brakes feel less responsive, it may indicate that the brake drums are worn and need replacement.
Step-by-Step Guide to Replacing Brake Drums
replacing brake drums

If you decide to take on the task of replacing brake drums yourself, here’s a general guide
1. Gather Tools and Materials You will need a jack, jack stands, a lug wrench, a brake drum puller, and new brake drums and shoes.
2. Lift the Vehicle Start by securely lifting the vehicle with the jack, and place jack stands under the vehicle for safety.
3. Remove the Wheel Use the lug wrench to remove the lug nuts and take off the wheel to access the brake components.
4. Remove the Brake Drum If the drum is stuck, you may need to use a brake drum puller. Once free, slide the drum off the axle.
5. Inspect Components Check the brake shoes and other components for wear. If they are excessively worn, consider replacing them as well.
6. Install New Brake Drum Slide the new drum onto the axle, ensuring it fits snugly.
7. Reassemble Reinstall the wheel and lower the vehicle. Tighten the lug nuts in a crisscross pattern to ensure even pressure.
8. Test the Brakes Before a long drive, pump the brakes a few times to ensure they are functioning correctly. Test drive at low speeds to confirm that everything is operating smoothly.
Conclusion
Replacing brake drums is a vital maintenance task that can help ensure the safety and performance of your vehicle. Regular inspections and awareness of your vehicle's braking system will help you catch wear early, preventing costly repairs and, more importantly, ensuring your safety on the road. If you're not comfortable performing the replacement yourself, don’t hesitate to consult a professional mechanic. Safe driving starts with a well-maintained braking system.
-
High-Quality Brake Drum MAZ – Durable Drum Brake Drum & Brake Drum and Brake Shoe Solutions
NewsJul.05,2025
-
High-Quality Brake Drum Iveco - Durable Drum Brake Drum & Brake Shoe Solutions
NewsJul.05,2025
-
High-Quality Brake Drum MAZ – Durable Drum Brake Drum & Brake Drum and Brake Shoe Solutions
NewsJul.04,2025
-
Brake Drum Man - High-Quality Drum Brake Drums & Brake Shoes for Reliable Performance
NewsJun.24,2025
-
High-Quality Brake Drum Kamaz – Durable Drum Brake Drum & Brake Shoe Replacement
NewsJun.10,2025
-
High-Quality Brake Drum Liza for Drum Brake Systems - Superior Durability and Performance
NewsJun.10,2025
