Nov . 22, 2024 06:29 Back to list
how to build a brake drum forge
How to Build a Brake Drum Forge
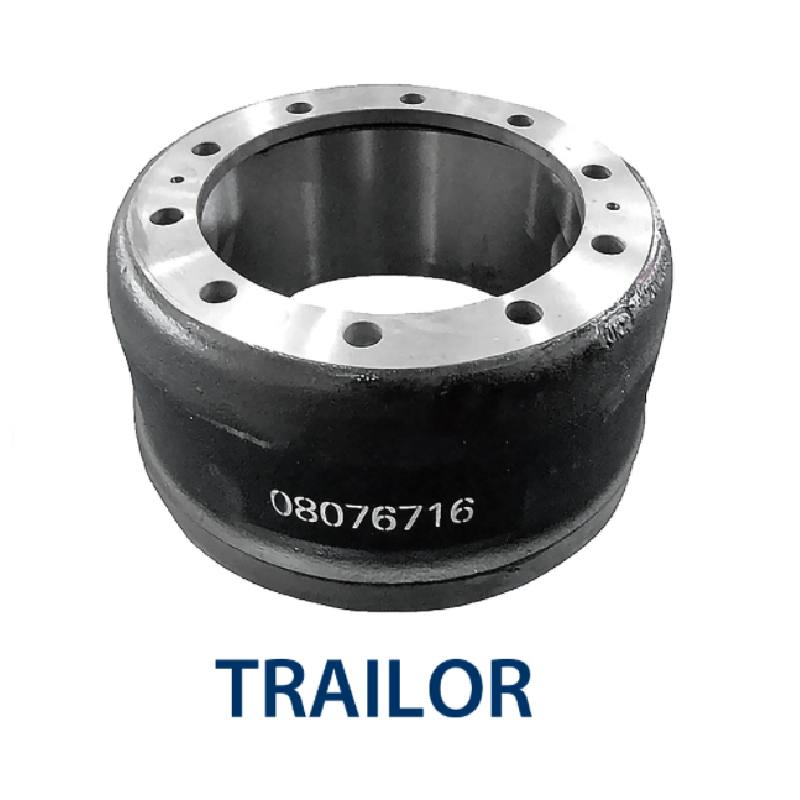
Building a brake drum forge is an excellent project for blacksmiths and metalworkers looking to create an efficient and portable forge for shaping metal. A brake drum provides a durable and effective heat-retaining chamber that can reach the high temperatures needed for forging. This article will guide you through the steps to build your own brake drum forge.
Materials Needed
1. Brake Drum You can source an old brake drum from an auto repair shop or scrap yard. Ensure it's free from cracks and major damage. 2. Rim A metal rim will be useful for creating a sturdy base to mount your brake drum. 3. Blower An old hairdryer or a small shop blower will provide the necessary airflow to increase the forge’s heat. 4. Insulation High-temperature ceramic blanket or firebricks can be used to line the interior for better heat retention. 5. Steel Grate A metal grate will allow for proper airflow and ensure your fuel burns efficiently. 6. Fuel Charcoal or coal can be used as the primary fuel source. For cost-effectiveness, charcoal is often the preferred choice for small forges.
Tools Required
- Angle grinder with metal cutting discs - Drill with metal drill bits - Wrenches - Welding equipment (if you choose to weld) - Safety equipment (gloves, goggles, fire extinguisher)
Step-by-Step Guide
1. Prepare the Brake Drum Begin by cleaning the brake drum thoroughly. Remove any old grease or debris to ensure a clean surface for your forge. If it’s particularly dirty, you might want to wire brush it or sand it down.
2. Create the Air Supply Cut a hole near the bottom of the drum to fit your blower. This hole will allow you to connect the blower and provide airflow to enhance combustion. If you’re utilizing a hairdryer, make sure it fits snugly to prevent air leaks.
how to build a brake drum forge

3. Install the Grate Cut a piece of steel to form a grate that fits inside the brake drum, a few inches above the bottom. This will hold your charcoal or coal and allow air to flow beneath it. Secure it in place using metal brackets or arms attached to the sides of the drum.
4. Insulate the Forge Line the interior of the brake drum with high-temperature insulation. This will help retain heat, making your forge more efficient. If using a ceramic blanket or firebricks, make sure they are cut to fit the inside contours of the drum.
5. Mount the Forge Use a metal rim or frame to create a stable base for your forge. You can bolt the brake drum onto this base, ensuring it is secure and won't tip over during use. The height should allow you to comfortably work at it.
6. Connect the Blower Position your blower above the hole you created for it. Make sure it fits tightly and is secure. If using a hairdryer, you can use duct tape or clamps to hold it in place. Test the blower to ensure it effectively pushes air into the forge.
7. Test the Forge Once everything is assembled, it’s time to test your forge. Start by adding charcoal or coal to the grate and ignite it. Gradually turn on the blower to increase airflow and watch as the temperature climbs.
8. Safety First Always prioritize safety when working with a forge. Make sure you have a fire extinguisher handy, and work in a well-ventilated area. Wear appropriate safety gear, including gloves and goggles, to protect yourself from hot materials and sparks.
Conclusion
Building a brake drum forge is a rewarding project that will enhance your metalworking capabilities. Not only is it cost-effective, but it also allows you to recycle an old part into a functional tool. With the right materials and careful construction, you’ll have a versatile forge that can handle various forging tasks, from simple hooks to more complex metal art. Happy forging!
-
Brake Drum Man - High-Quality Drum Brake Drums & Brake Shoes for Reliable Performance
NewsJun.24,2025
-
High-Quality Brake Drum Kamaz – Durable Drum Brake Drum & Brake Shoe Replacement
NewsJun.10,2025
-
High-Quality Brake Drum Liza for Drum Brake Systems - Superior Durability and Performance
NewsJun.10,2025
-
High-Quality Brake Drum Kamaz – Durable Drum Brake Drum & Brake Shoe Solutions
NewsJun.10,2025
-
Durable Kamaz Brake Drums High-Performance Truck Parts
NewsJun.09,2025
-
Premium Brake Drum Maz Kit with Shoes Enhanced Braking
NewsJun.09,2025
